Connect to your Google Play Store Account
Connecting Botsi to your Google Play Store account is a fundamental step in managing your Android app's in-app purchases and subscriptions effectively. This integration involves configuring specific elements within your Google Play Developer Console and linking them securely to Botsi. By establishing this connection, you will unlock Botsi's capabilities for analyzing purchase data, managing subscriptions, and gaining valuable insights into your app's revenue streams.
To facilitate this integration, you will need to address the following key aspects within the Google ecosystem:
Let's delve into each of these steps to ensure a successful integration.
Provide the Package Name
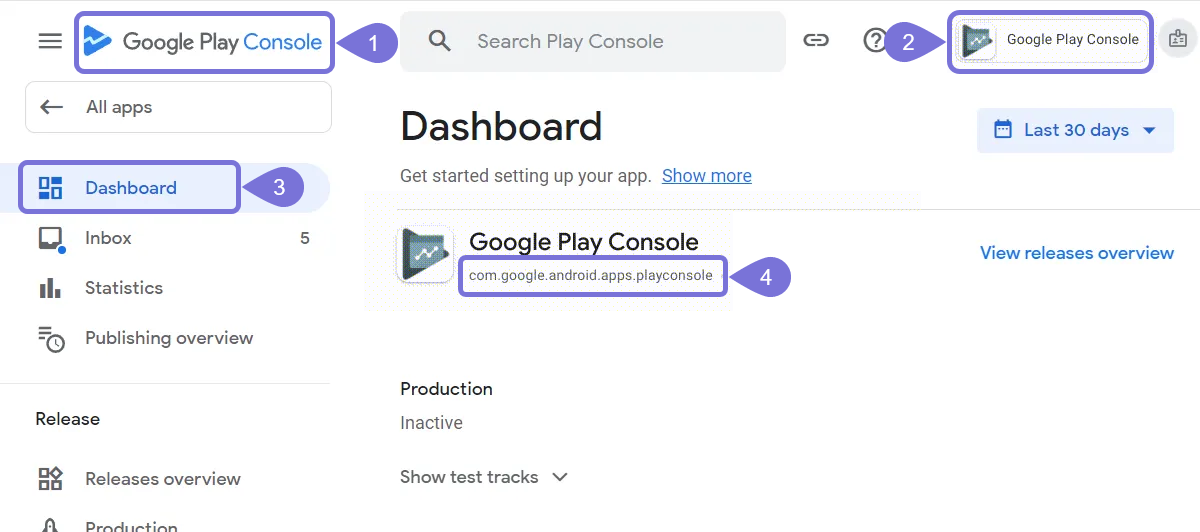
The Package Name is the unique identifier of your app in the Google Play Store. You can find it in the Google Play Developer Console under your application's name. Follow these steps to find it:
- Go to the Google Play Developer Console.
- Select your app from the list.
- On the left-hand menu, click on Dashboard or App Details.
- Locate the Package Name; it typically looks like
com.example.app. - Copy this value, as it will be required for API configuration and service account setup.
Enable the In-App Purchase API
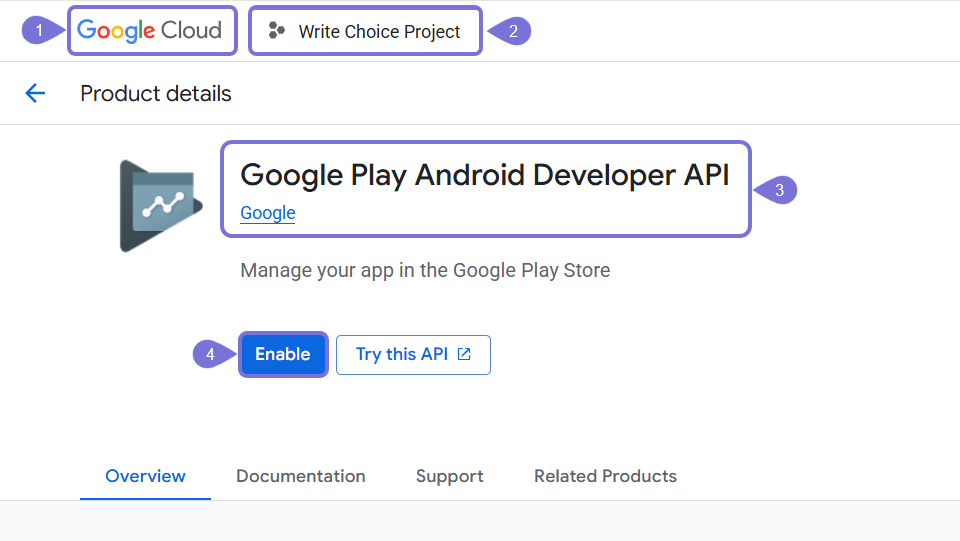
To manage purchases programmatically, you must enable the Google Play Developer API in your Google Cloud project. This allows your app or backend to query purchase data, verify transactions, and manage subscriptions.
- Go to the Google Cloud Console.
- Select your project (or create one if you have not already done it).
- Open the Google Play Android Developer API page.
- Search for Google Play Developer API and enable it. This API is essential for managing in-app purchases.
Get the Service Account Key File
To authenticate your app’s access to Google Play services, you will need a service account key file. This file links your Google Cloud project with the Play Developer Console and grants appropriate permissions for in-app purchase operations.
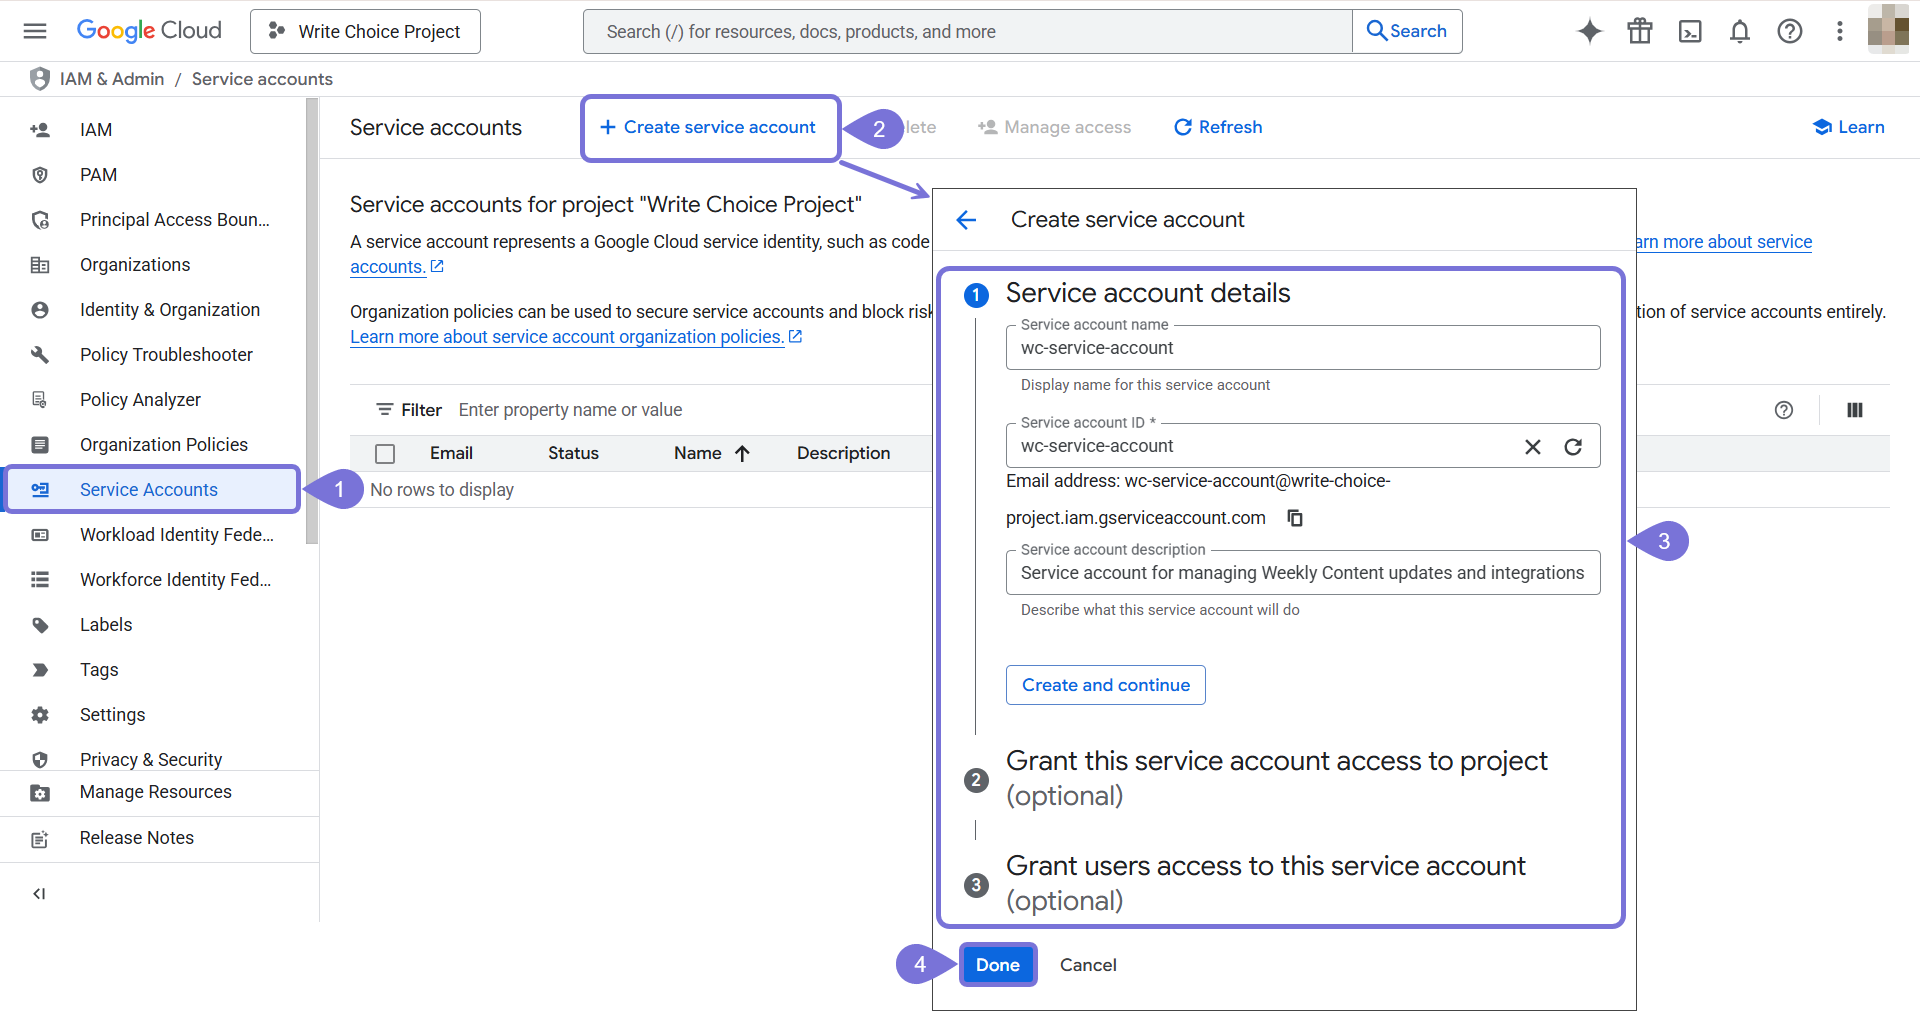
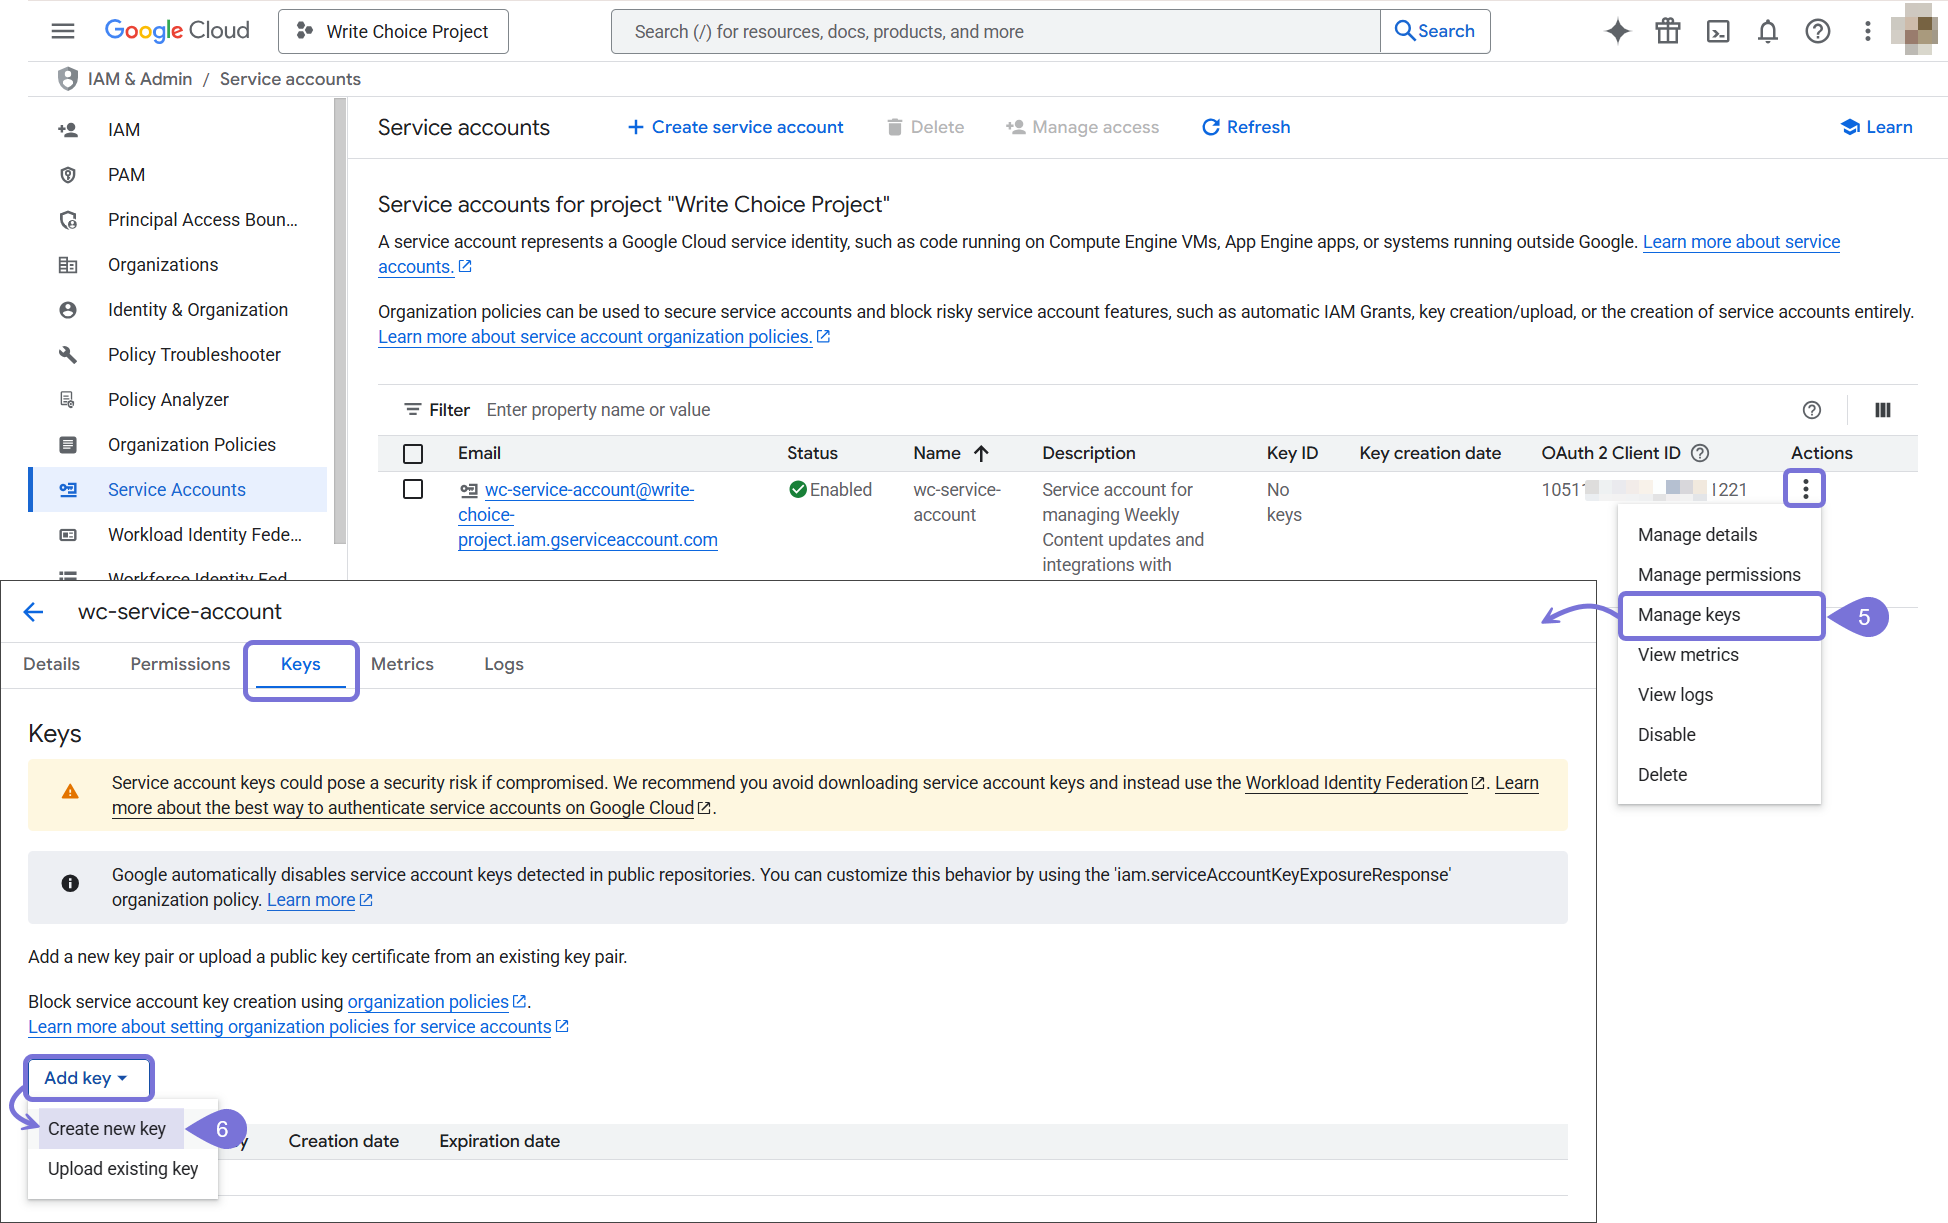
- In the Google Play Developer Console, go to Service Accounts.
- Click + Create service account (if you do not have one already) or use an existing one.
- In the page that opens, add the Service Account Details and then grant the service account the necessary accesses to the project.
- Click Done to finish its creation. The Service Account will appear listed.
- Go to the Actions column, click on the kebab menu, and select Manage keys. The Keys page will open.
- Click on Add key, and select Create new key.
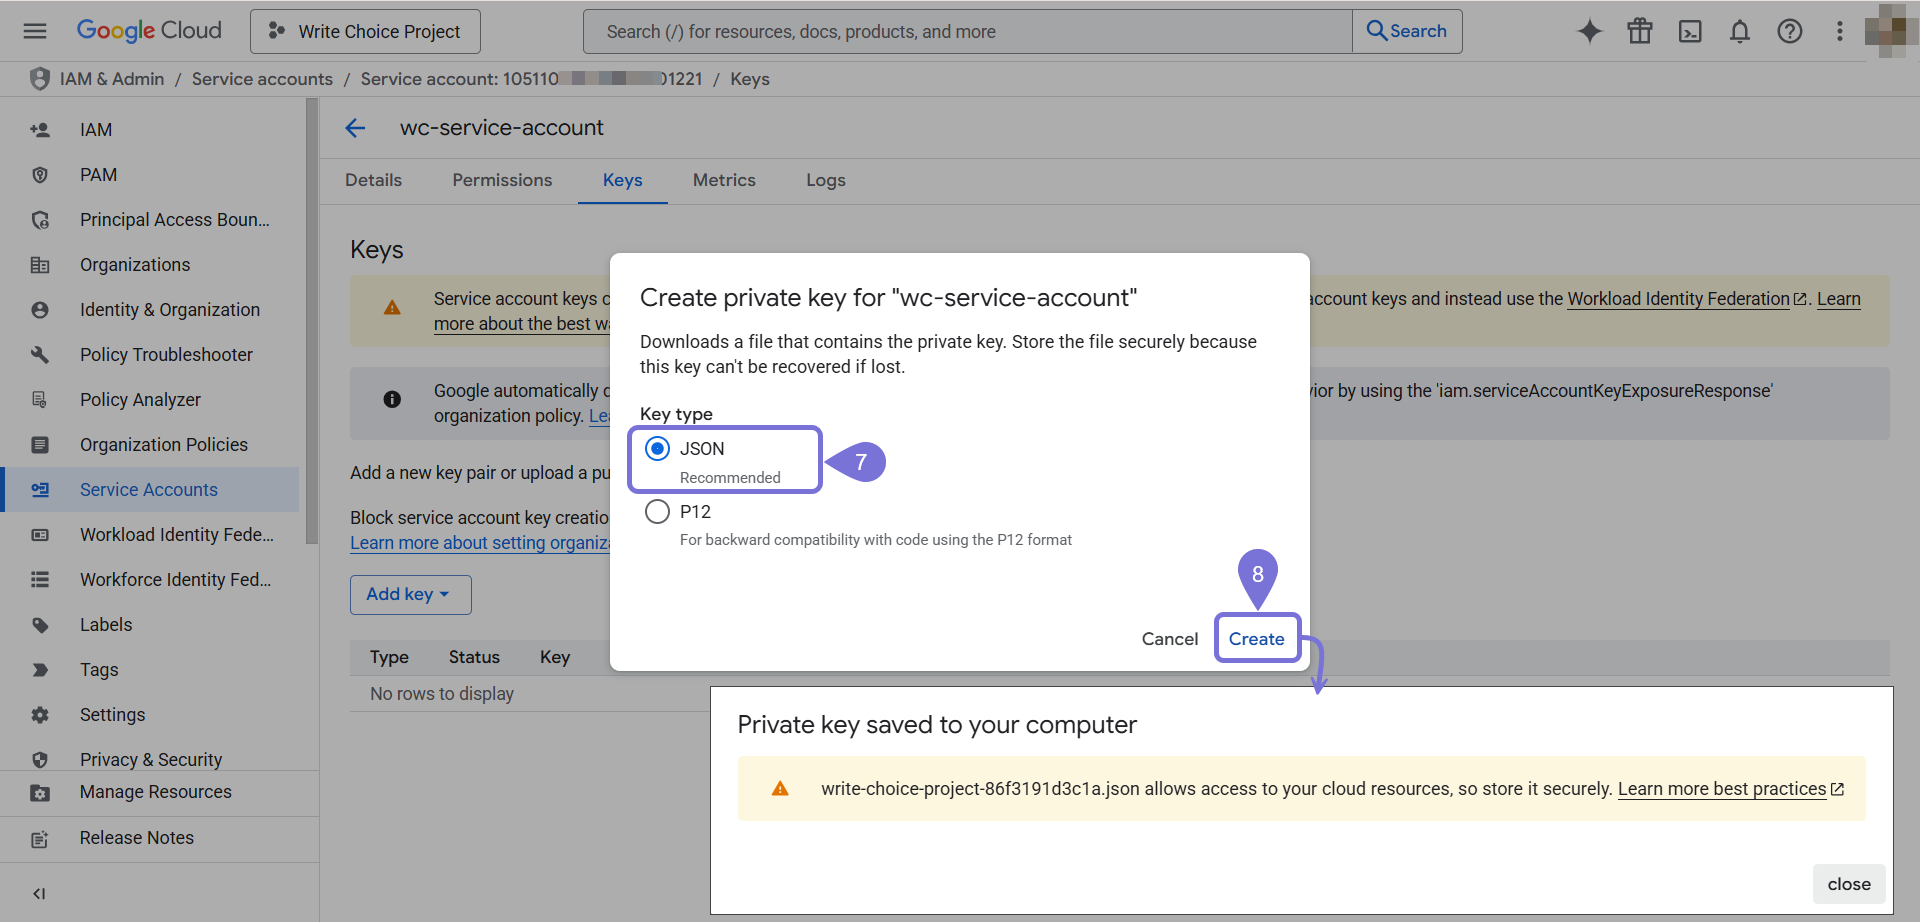
- In the modal window that opens, select JSON as the key file type for the service account.
- Click Create. You key will automatically be downloaded and a message will alert you of this action. Store this key in a safe folder, as you will need to upload it to your Botsi Dashboard.
Add your Credentials to Botsi
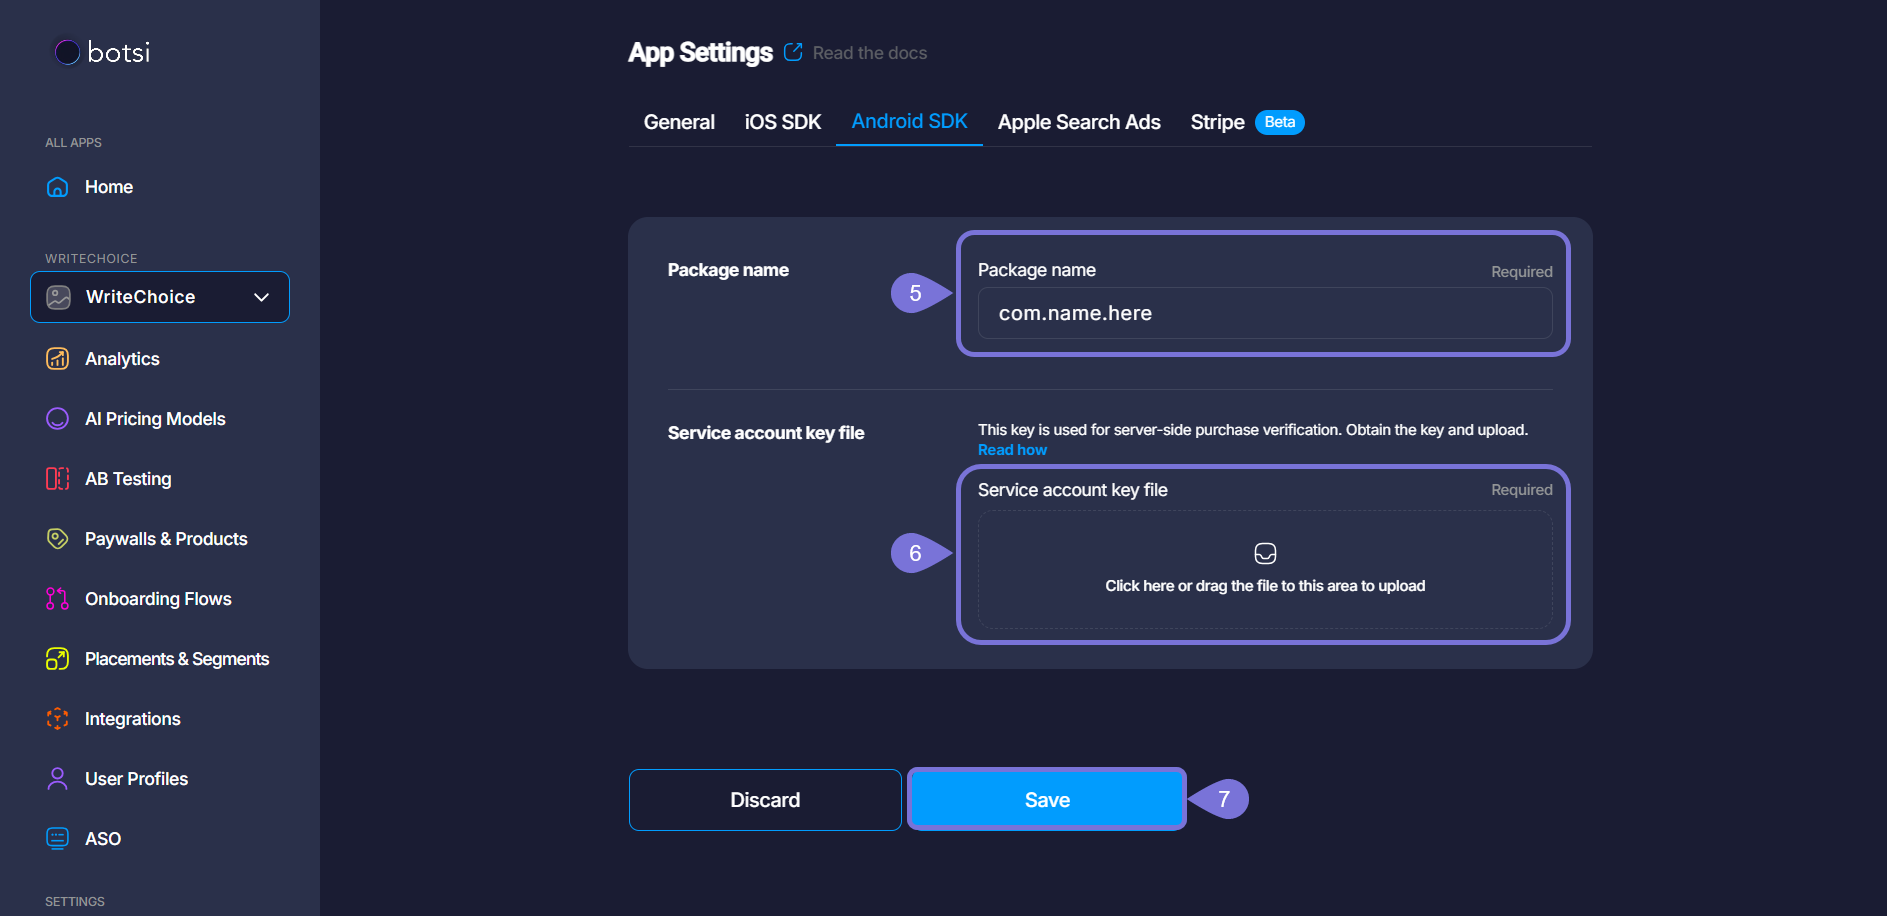
Once you have collected the necessary information from the Google Play Console, you can enter it in the Botsi dashboard as shown below.
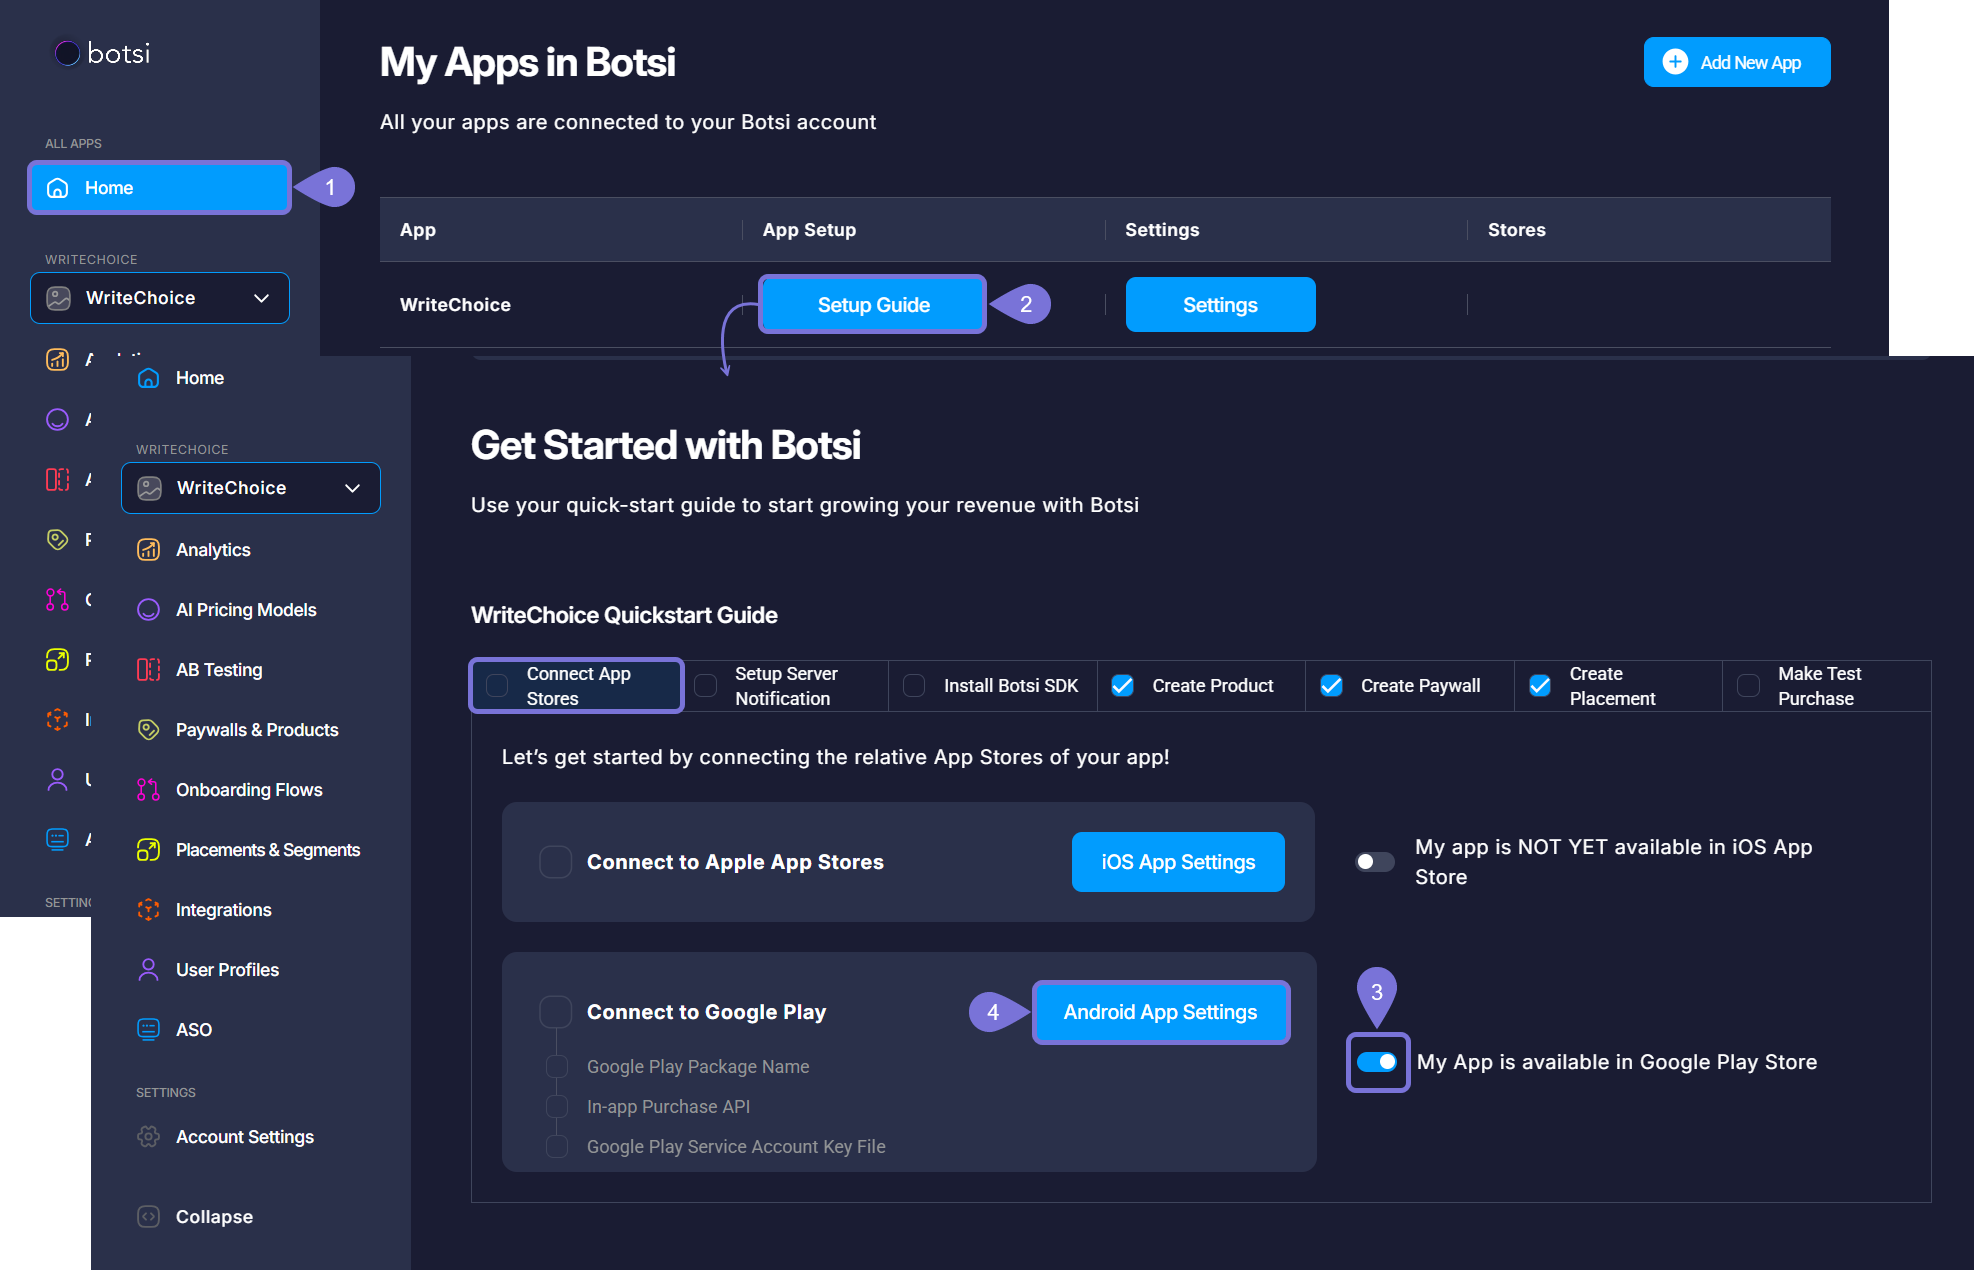
- Go to the Botsi Dashboard and click Home. There, you will visualize all the apps connected to your Botsi account.
- Find the app you want to work with and click Setup Guide under the App Setup column. The app Quickstart Guide page will open.
- In the Connect App Stores tab, enable the toggle: My App is available in iOS App Store.
- Click on Android App Settings. A new page will open.
- Paste this Package Name into the appropriate field.
- Upload the JSON file for the service account into the appropriate section within the Botsi interface.
- Click Save to keep your changes.