Set up Stripe Products in Botsi
In Botsi, creating a Product lets you connect a purchase, whether it is a subscription or a one-time payment, to a specific Access Level, defining exactly what users unlock when they buy. While Botsi supports purchases through various platforms, this guide is focused exclusively on configuring products with Stripe.
You will learn how to set up your products directly in Stripe, locate the necessary Product ID, and integrate everything seamlessly with Botsi. Follow the steps below to configure your Stripe Products and ensure smooth transaction tracking and event management.
Create Products in Stripe
If you are configuring in Sandbox mode, ensure that Test mode is enabled in Stripe before proceeding with this step.
- Log in to your Stripe Dashboard and go to the Product catalog in the left menu.
- Click the + Create product button. A modal window will open.
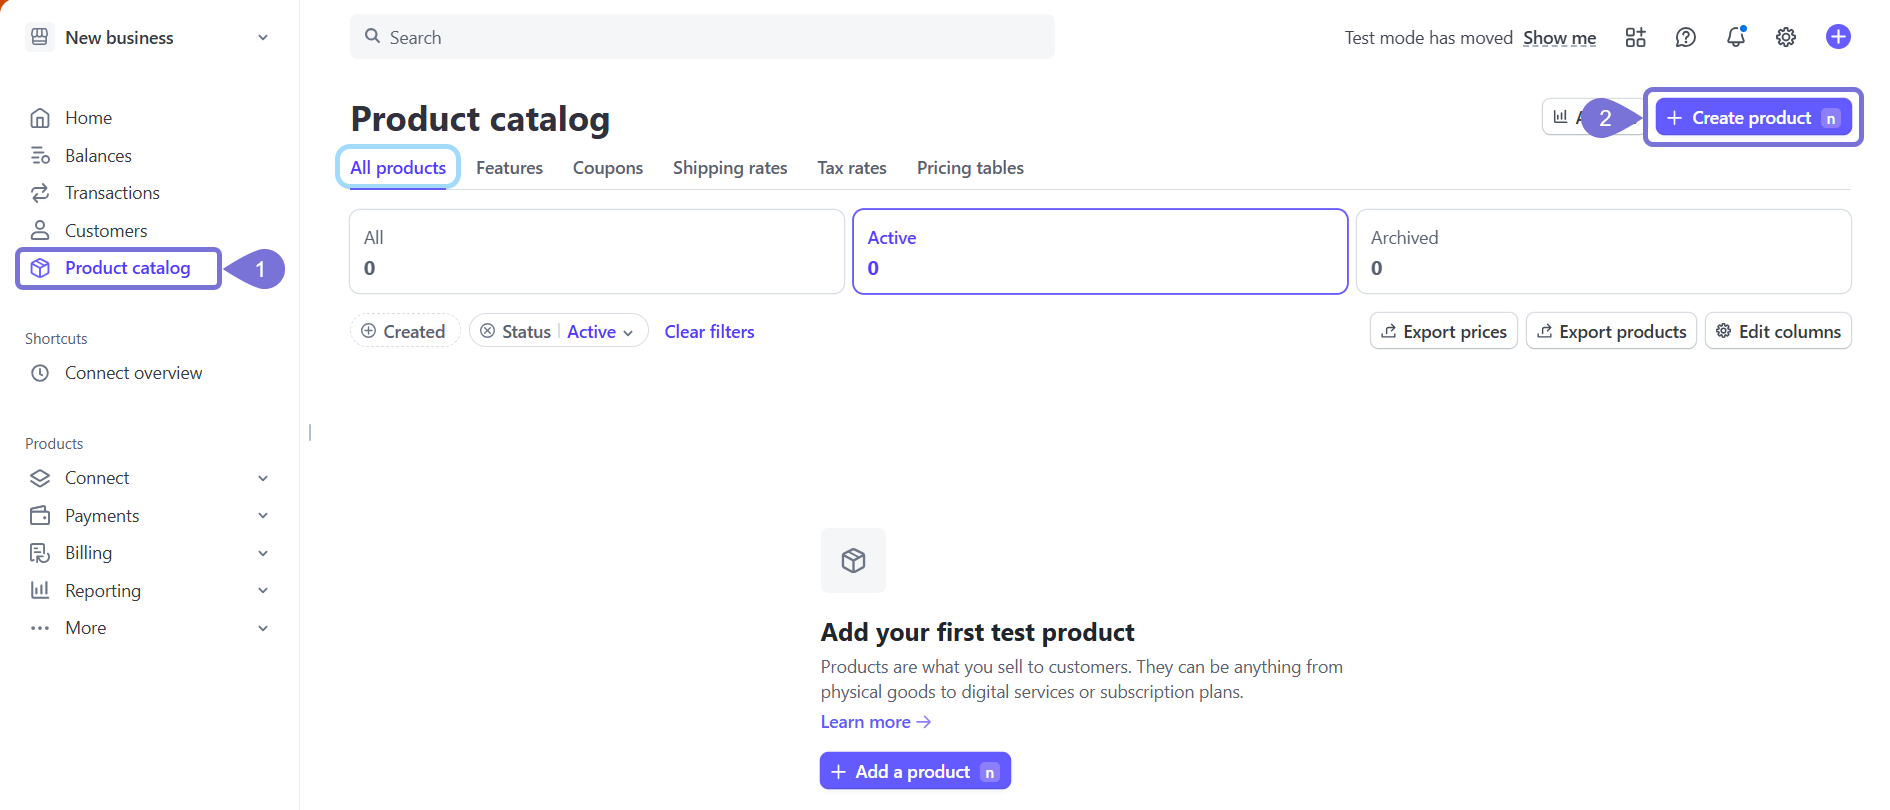
- Enter the product name, an (optional) description, and an (optional) image.
- Select a pricing model:
- Recurring: Charges the customer regularly (e.g., weekly, monthly, yearly). Ideal for subscriptions like memberships or software plans.
- One-off: Charges the customer only once. Ideal for single purchases like a product, an ebook, or a ticket.
- Set the amount and currency.
- Select the Billing period.
- Click Add product to finish. The Product will appear listed on the Product catalog page.

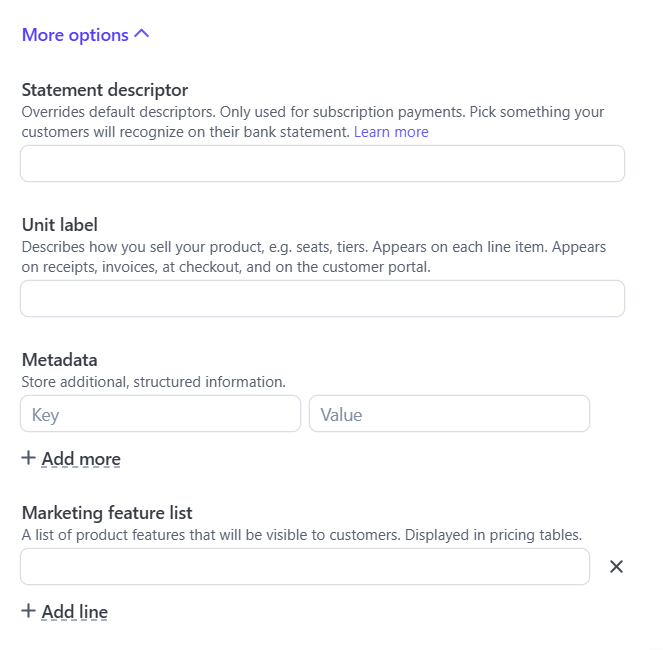
More Options
Click on More Options to add any of the following fields:
- Statement descriptor (It is what appears on customers' bank statements for subscription payments.)
- Unit label (It indicates how the product is sold, e.g., seats, users; shown on receipts and invoices.)
- Metadata (Key-value pairs for storing internal, structured data; not visible to customers.)
- Marketing feature list (It displays product features to customers in pricing tables.)
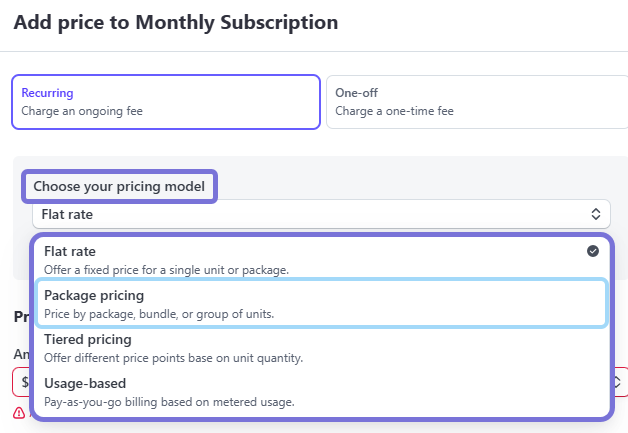
More Pricing Options
Stripe allows you to set up multiple pricing plans for each product, enabling you to offer different options without needing to create separate products. Click on More pricing options and:
- Choose your price model between:
- Flat rate: Offer a fixed price for a single unit or package.
- Package pricing: Price by package, bundle, or group of units.
- Tiered pricing: Offer different price points based on unit quantity.
- Usage-based: Pay-as-you-go billing based on metered usage.
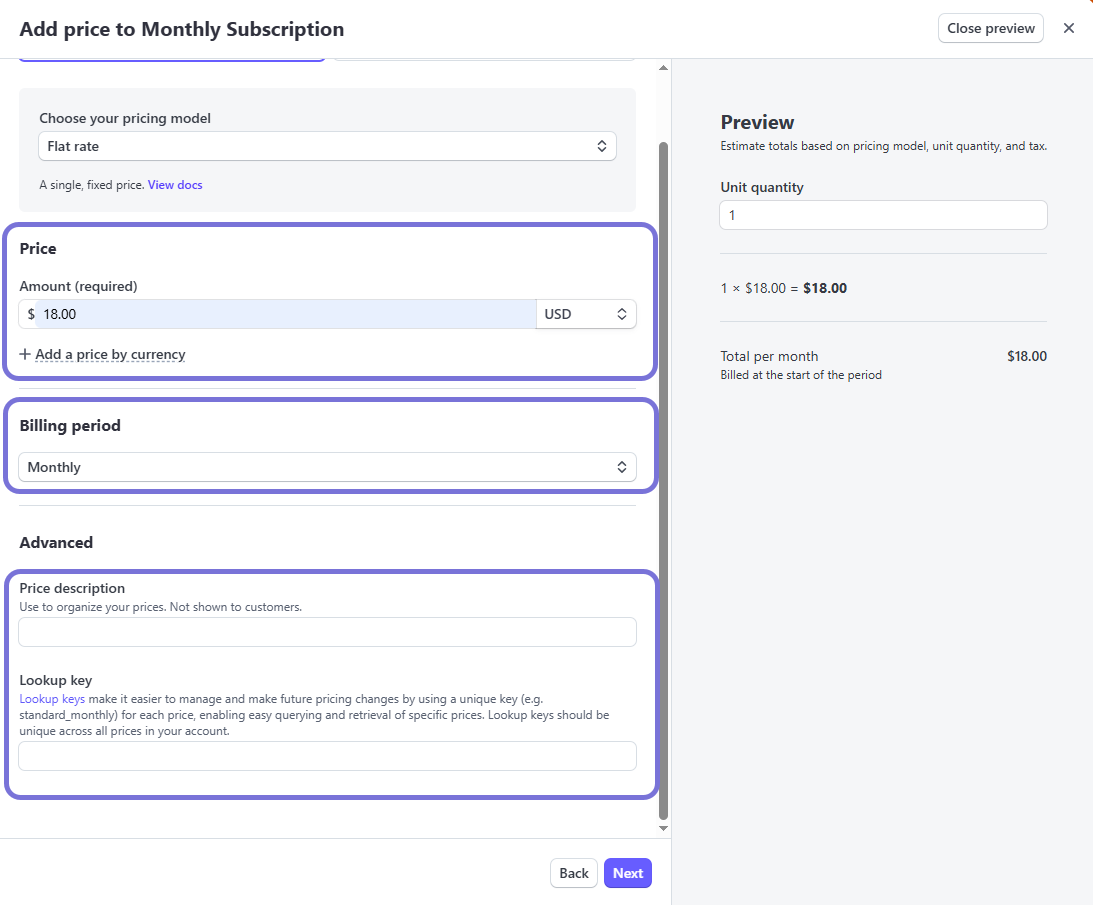
- Add the Price. Here, you can also set a price per currency.
- Select the Billing period (The frequency at which your customer is charged, e.g., monthly, yearly. It determines how often the subscription renews.)
- Advanced
- Add a Price description (A short label that explains what this price includes or represents (e.g., "Pro Plan – 10 users".)
- Input a Lookup key (A unique identifier you define for this price. Useful when referencing it in your code or API calls.)
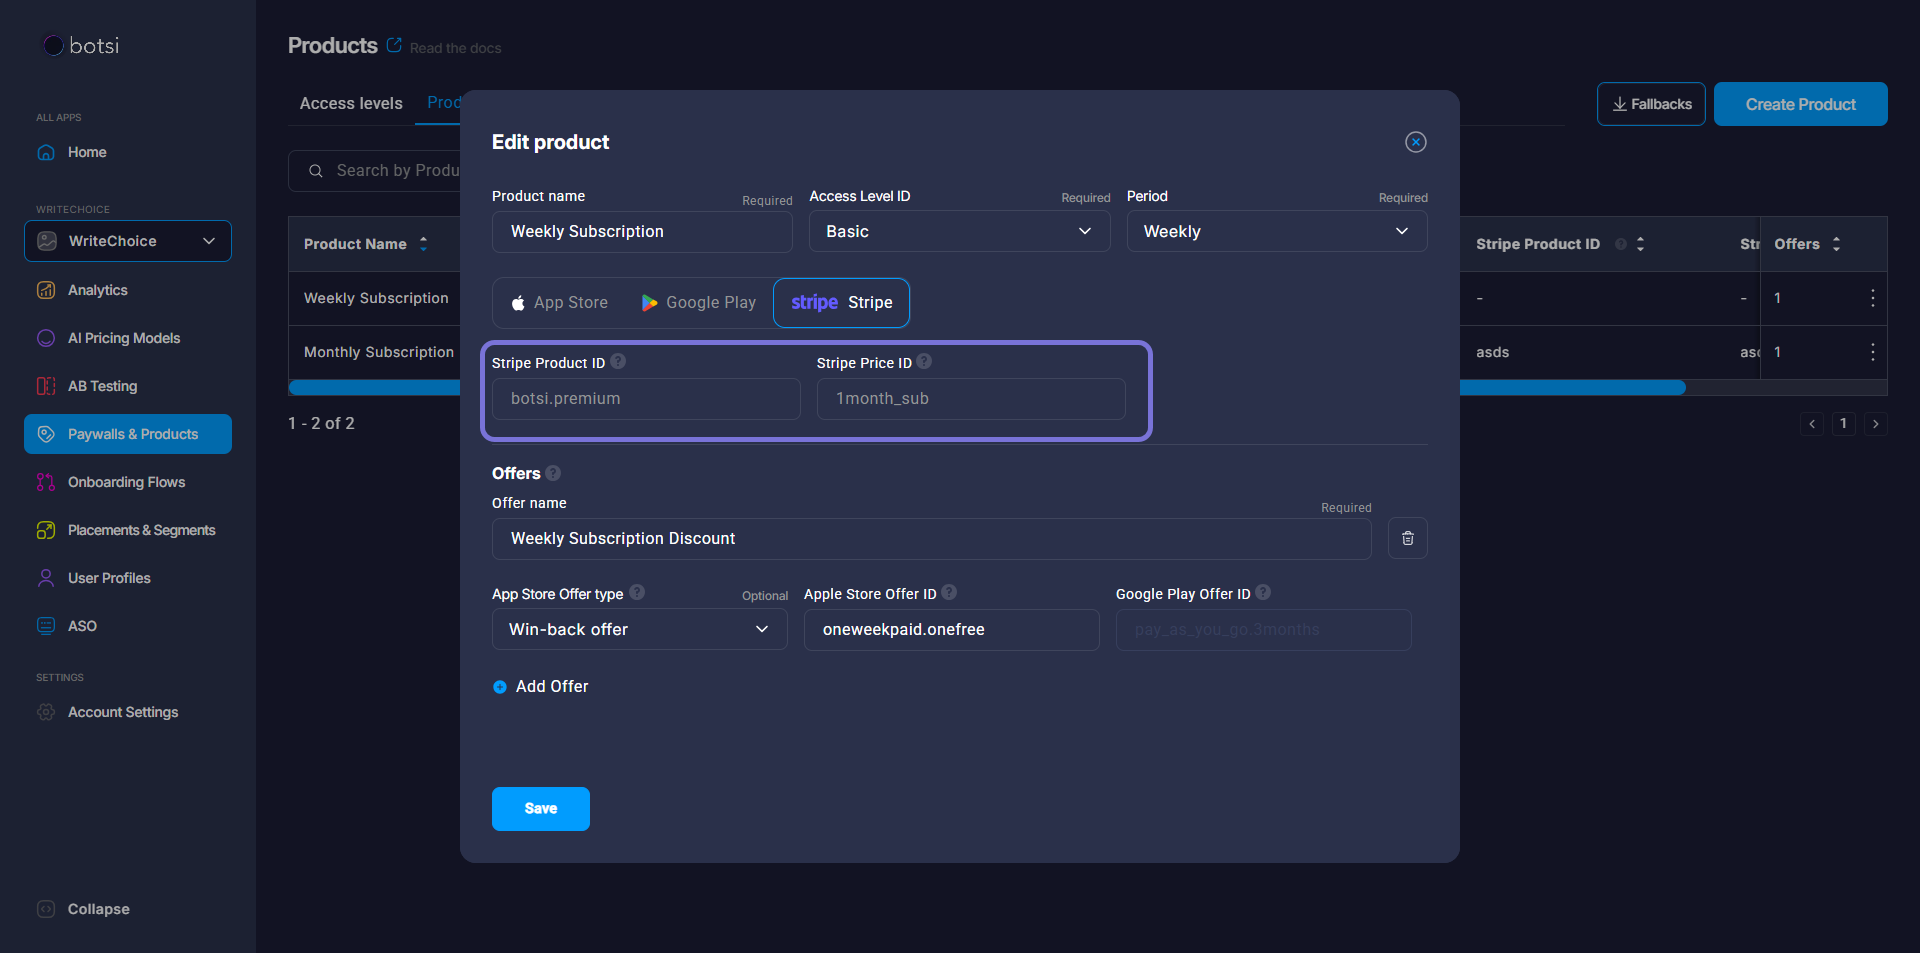
Add Stripe Products to Botsi
Botsi treats Stripe similarly to other stores, like the App Store and Google Play. As such, you will configure it similarly by adding Stripe products (product_id and price_id) in the Products section of the Botsi Dashboard. To locate the Product and Price ID:
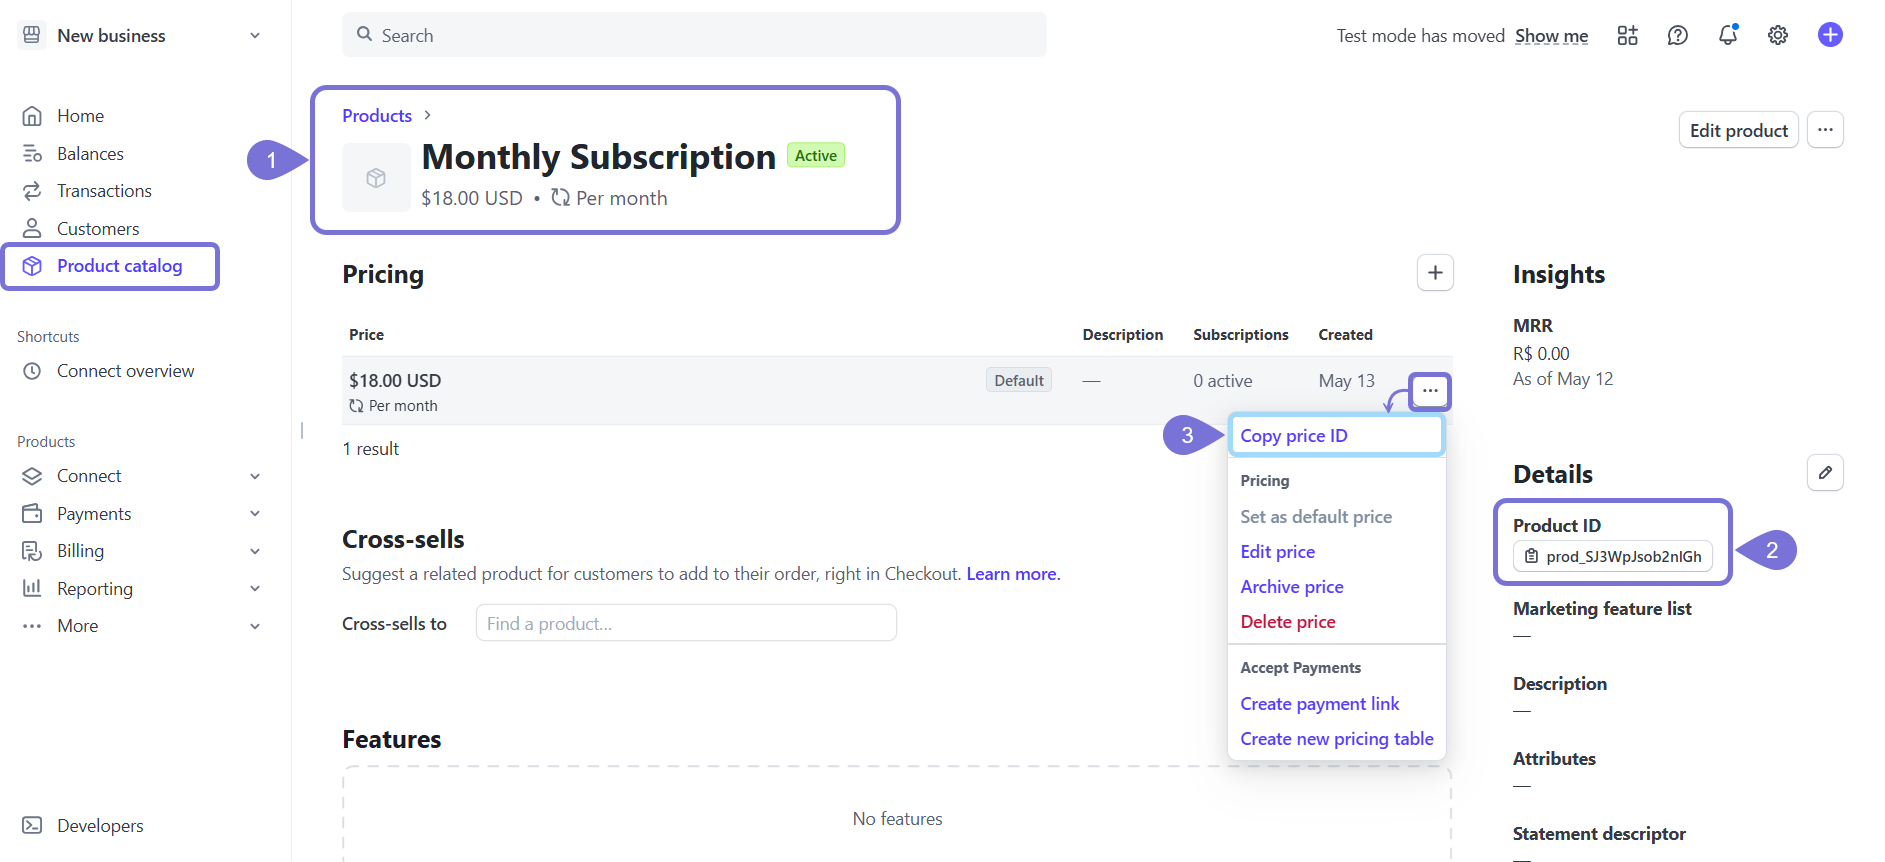
- Go to the Stripe's Product Catalog page and click on a product from the list. A new page will open.
- Within the Details section, you will find the Product ID. Copy it and store it to paste in Botsi.
- Expand the Meatballs menu (three horizontal dots) and click on Copy price ID. Store it safely to add in Botsi.
Once you have located them, add them to Botsi by following the steps on the Create a Product or the Edit a Product guides. Select Stripe as the Platform and in the fields that unfold, add the corresponding Stripe Product ID and Stripe Price ID.
Products are essential! Ensure you create your Stripe products within the Botsi Dashboard. Botsi only tracks transaction events linked to these products, so skipping this step will prevent event creation for transactions.
Profile Creation Rules
To make purchases accessible on a mobile device, Botsi links each transaction to a User Profile. By default, it creates a new profile when it receives a webhook from Stripe. You can define which identifier Botsi should use for assigning customer profiles:
- Recommended: The
customer_user_idvalue added to metadata (as shown in More options) - The
emailfield from the Customer object in Stripe's docs. - The
client_reference_idfrom the Session object in Stripe.
You can choose your preferred identifier in App Settings > Stripe.
-
If a transaction does not include the chosen identifier, no profile will be created. The event will be treated as anonymous unless later associated with a profile, for instance, through server-side validation. These anonymous transactions still appear in Analytics, but they will not be included in features that rely on profile data, such as LTV, Cohorts, or Conversion metrics. They will also be excluded from the Event feed.
-
While there is an option to skip profile creation entirely, it is not advised due to the reduced visibility and functionality in analytics.