AI Pricing Integration Guide
Botsi AI Pricing Model helps you dynamically select and display the most effective paywall for different user segments, aiming to enhance conversion rates. This guide walks you through the prerequisites and configuration steps to get your AI Pricing Model up and running.
Configuration Requirements
Before the AI pricing model configuration, at least one Application should be configured in Botsi.
To start configuring the AI Pricing Model, you need to have several components already set up in the Botsi platform. Please ensure you have completed the following configurations.
Follow the guides below for detailed instructions on setting up each requirement:
AI Pricing Model Configuration
Once all the prerequisites are met, you can proceed with configuring the AI Pricing Model itself. To configure your model, follow these steps:
-
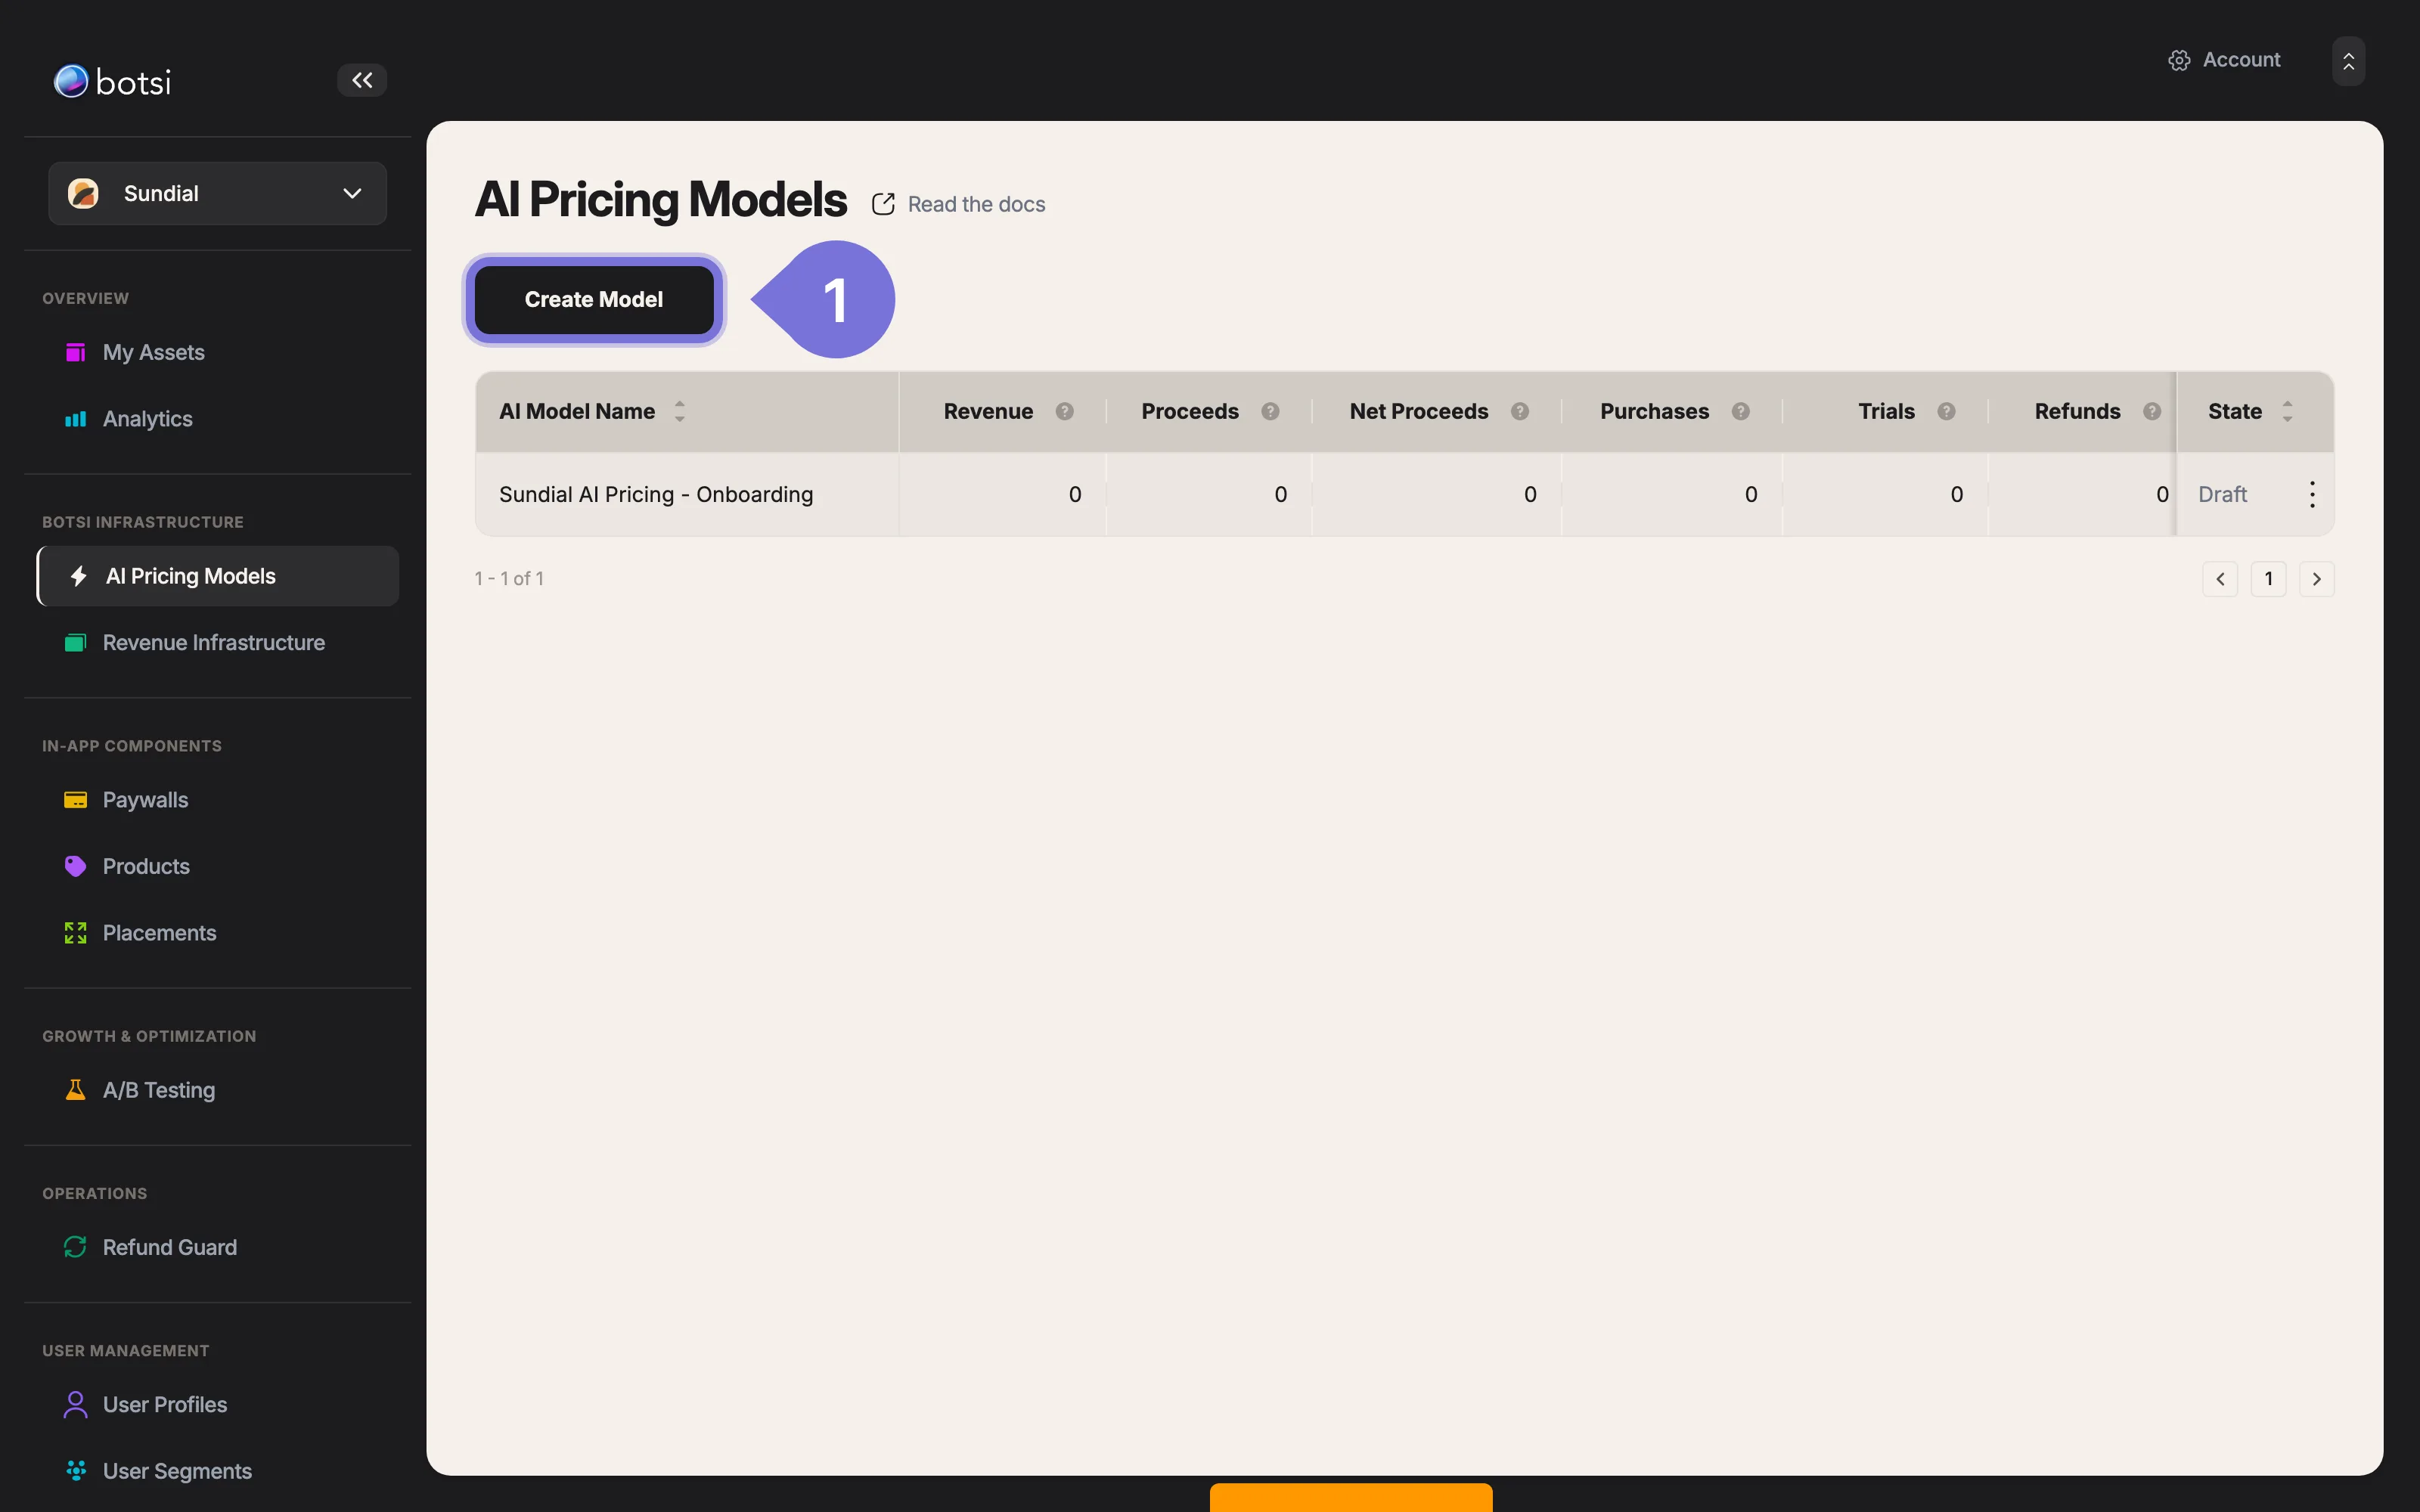
Navigate to the AI Pricing Models page and click the Create Model button. This will launch the configuration form.
If you don’t have any models yet, you will see an informational page with a brief overview of the feature. To begin the configuration process, click the Get Started button.
-
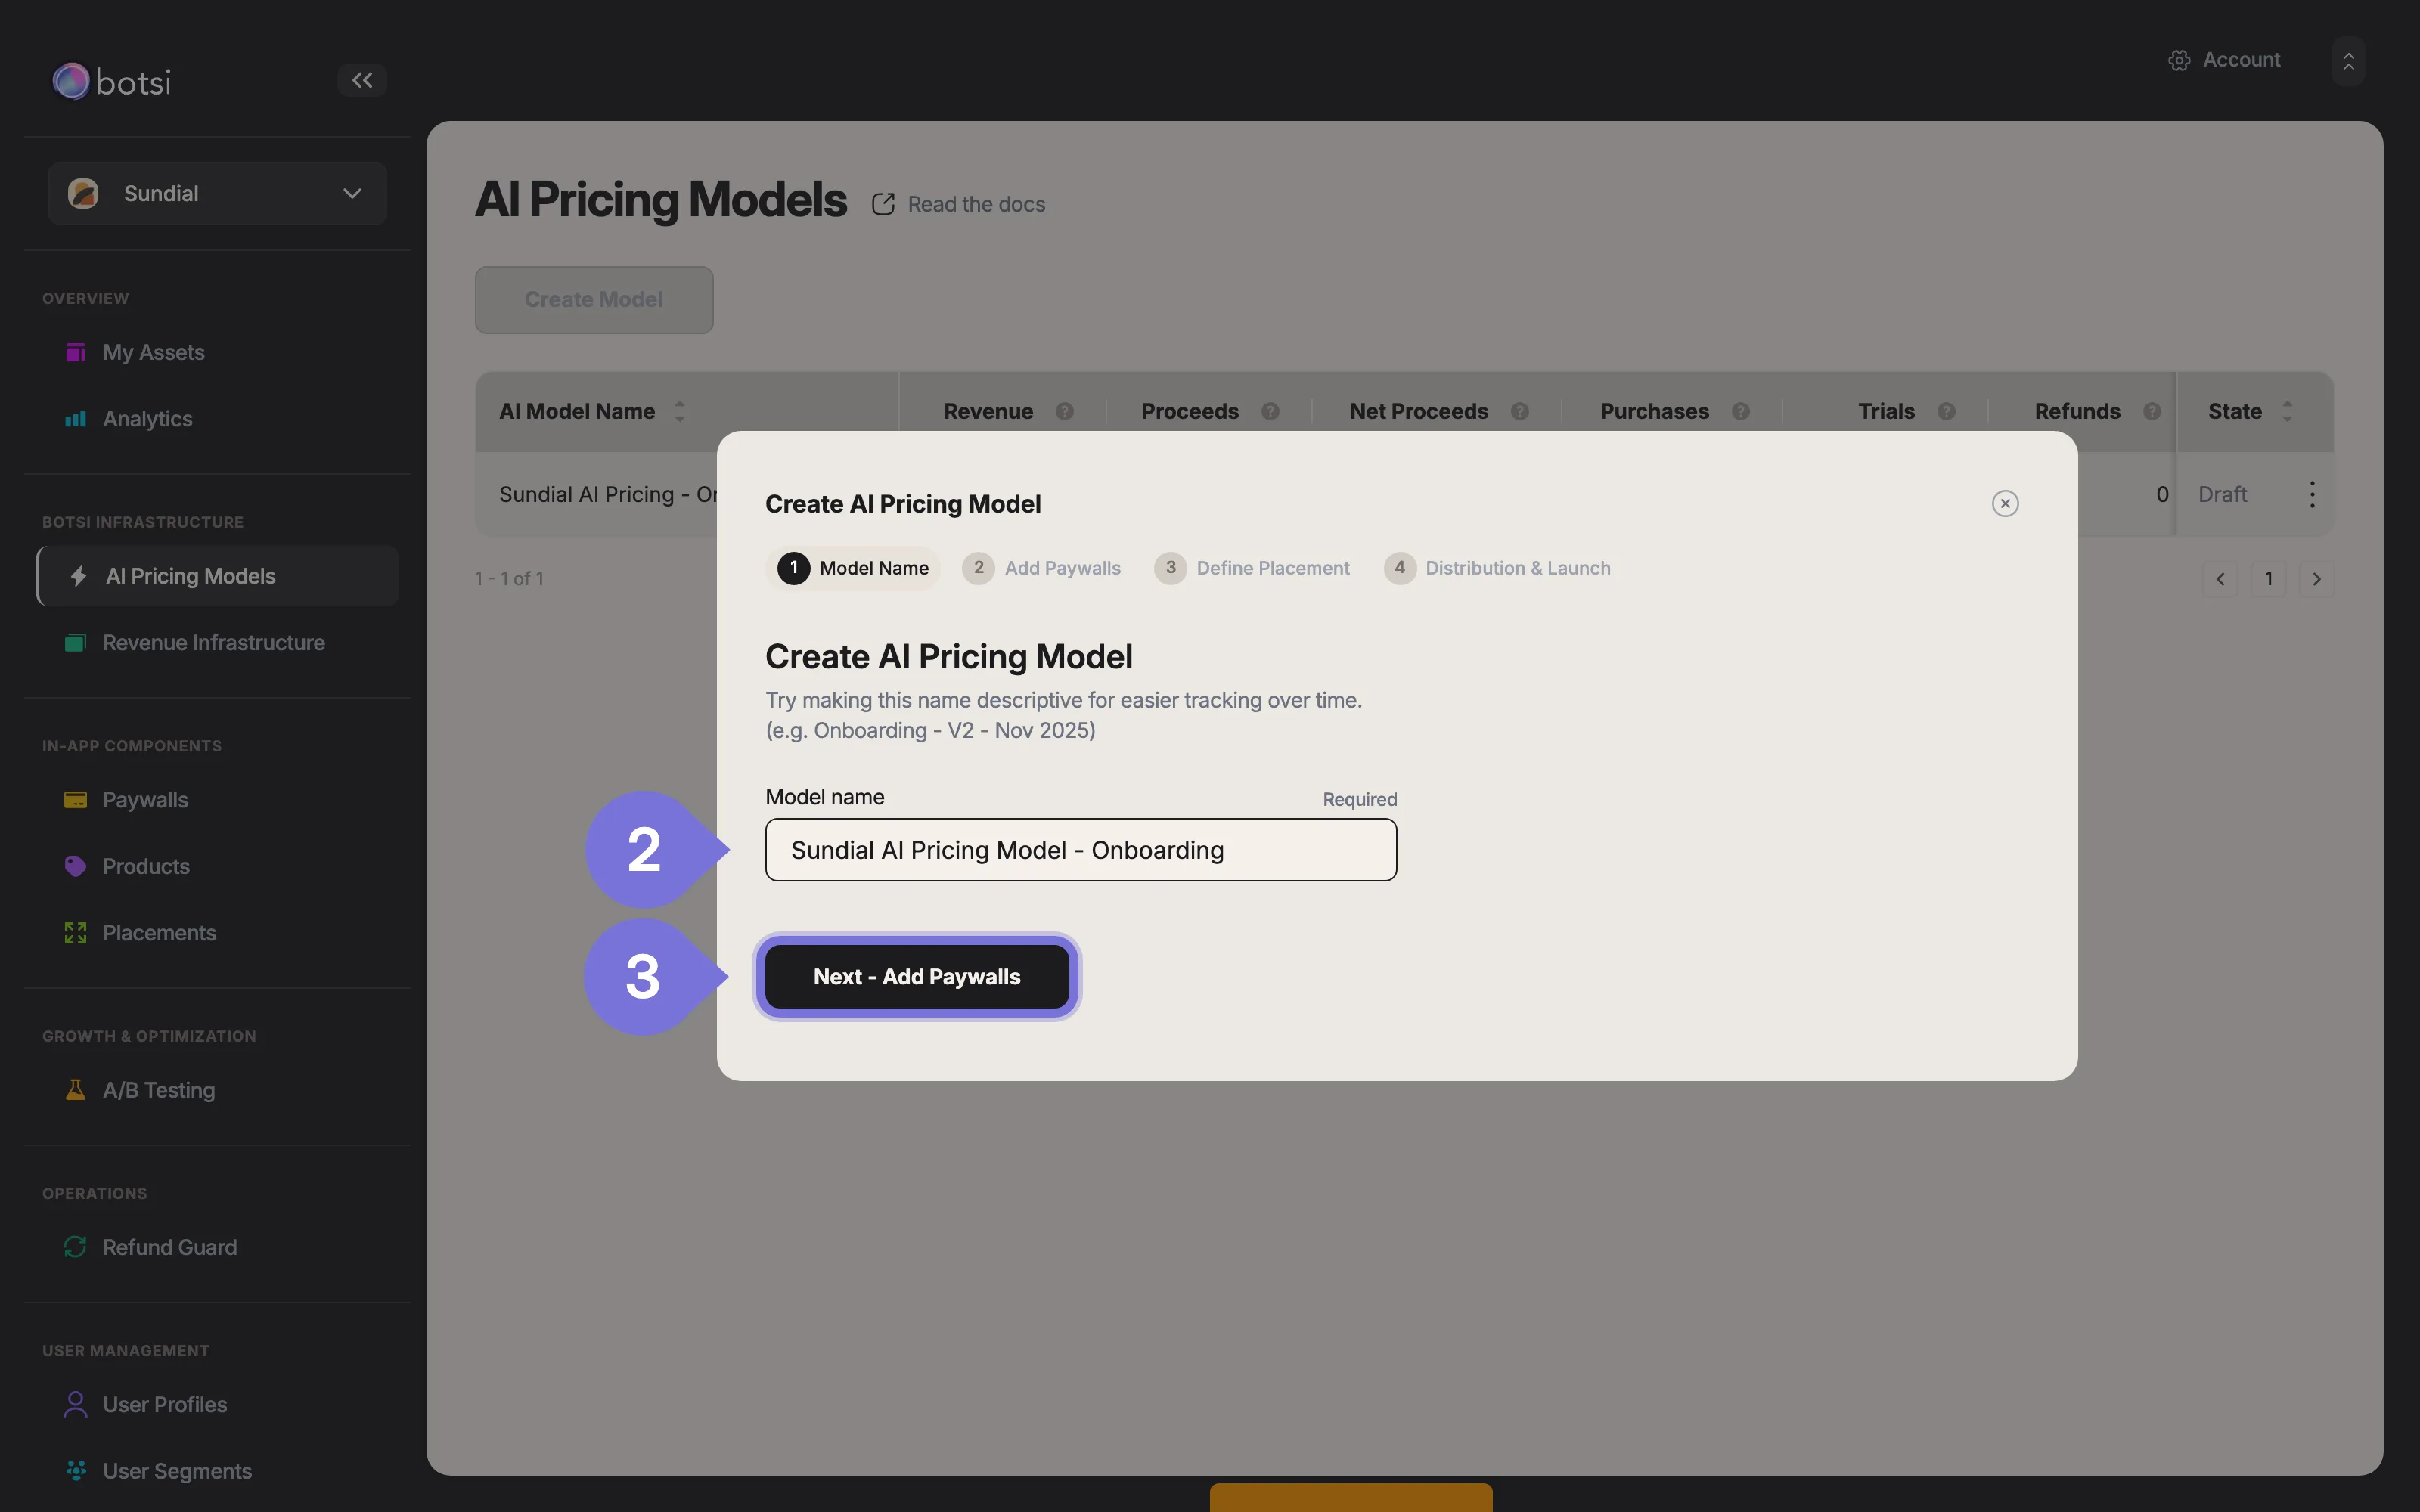
Enter a descriptive name for your model in Step 1. This will help you identify it later.
-
Click Next - Add Paywalls to proceed to Step 2.
-
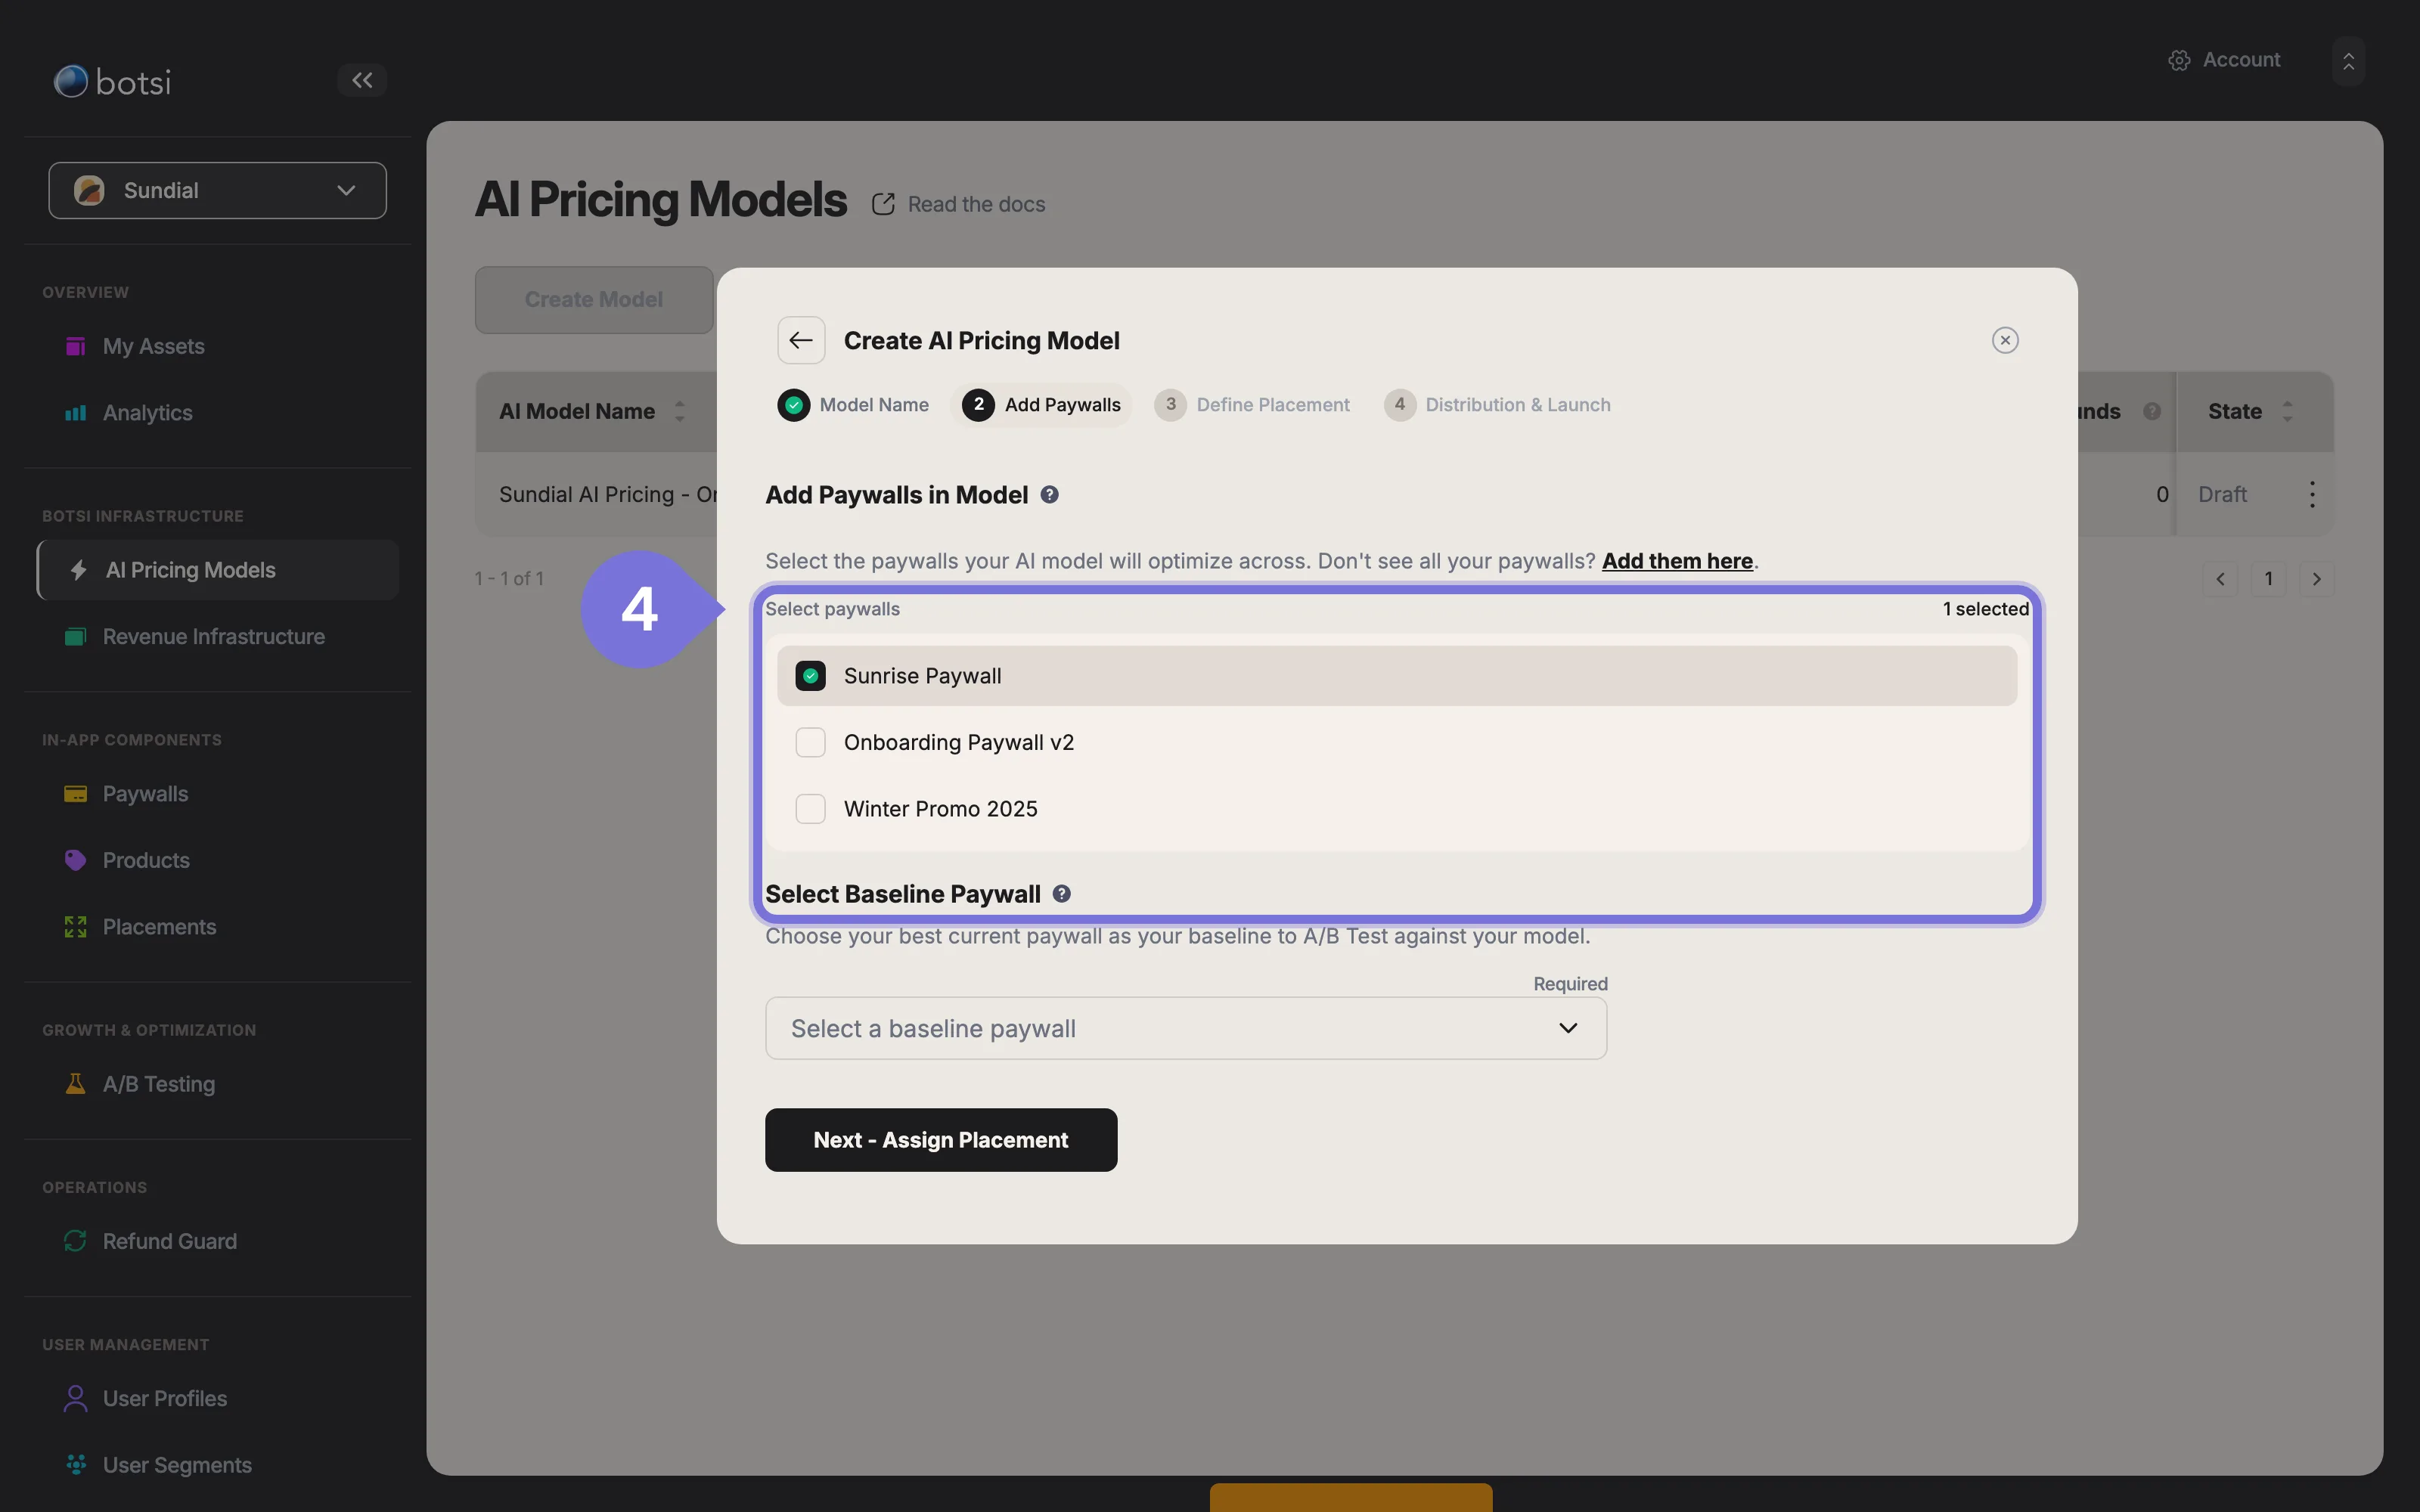
In Step 2, select all the paywalls that will be part of the prediction model. The model analyzes the performance of these paywalls to find the best option for each user.
Then choose a Baseline Paywall. It serves as the comparison paywall for the model and as the fallback shown if the prediction API does not respond. Click Next - Assign Placement to continue.
-
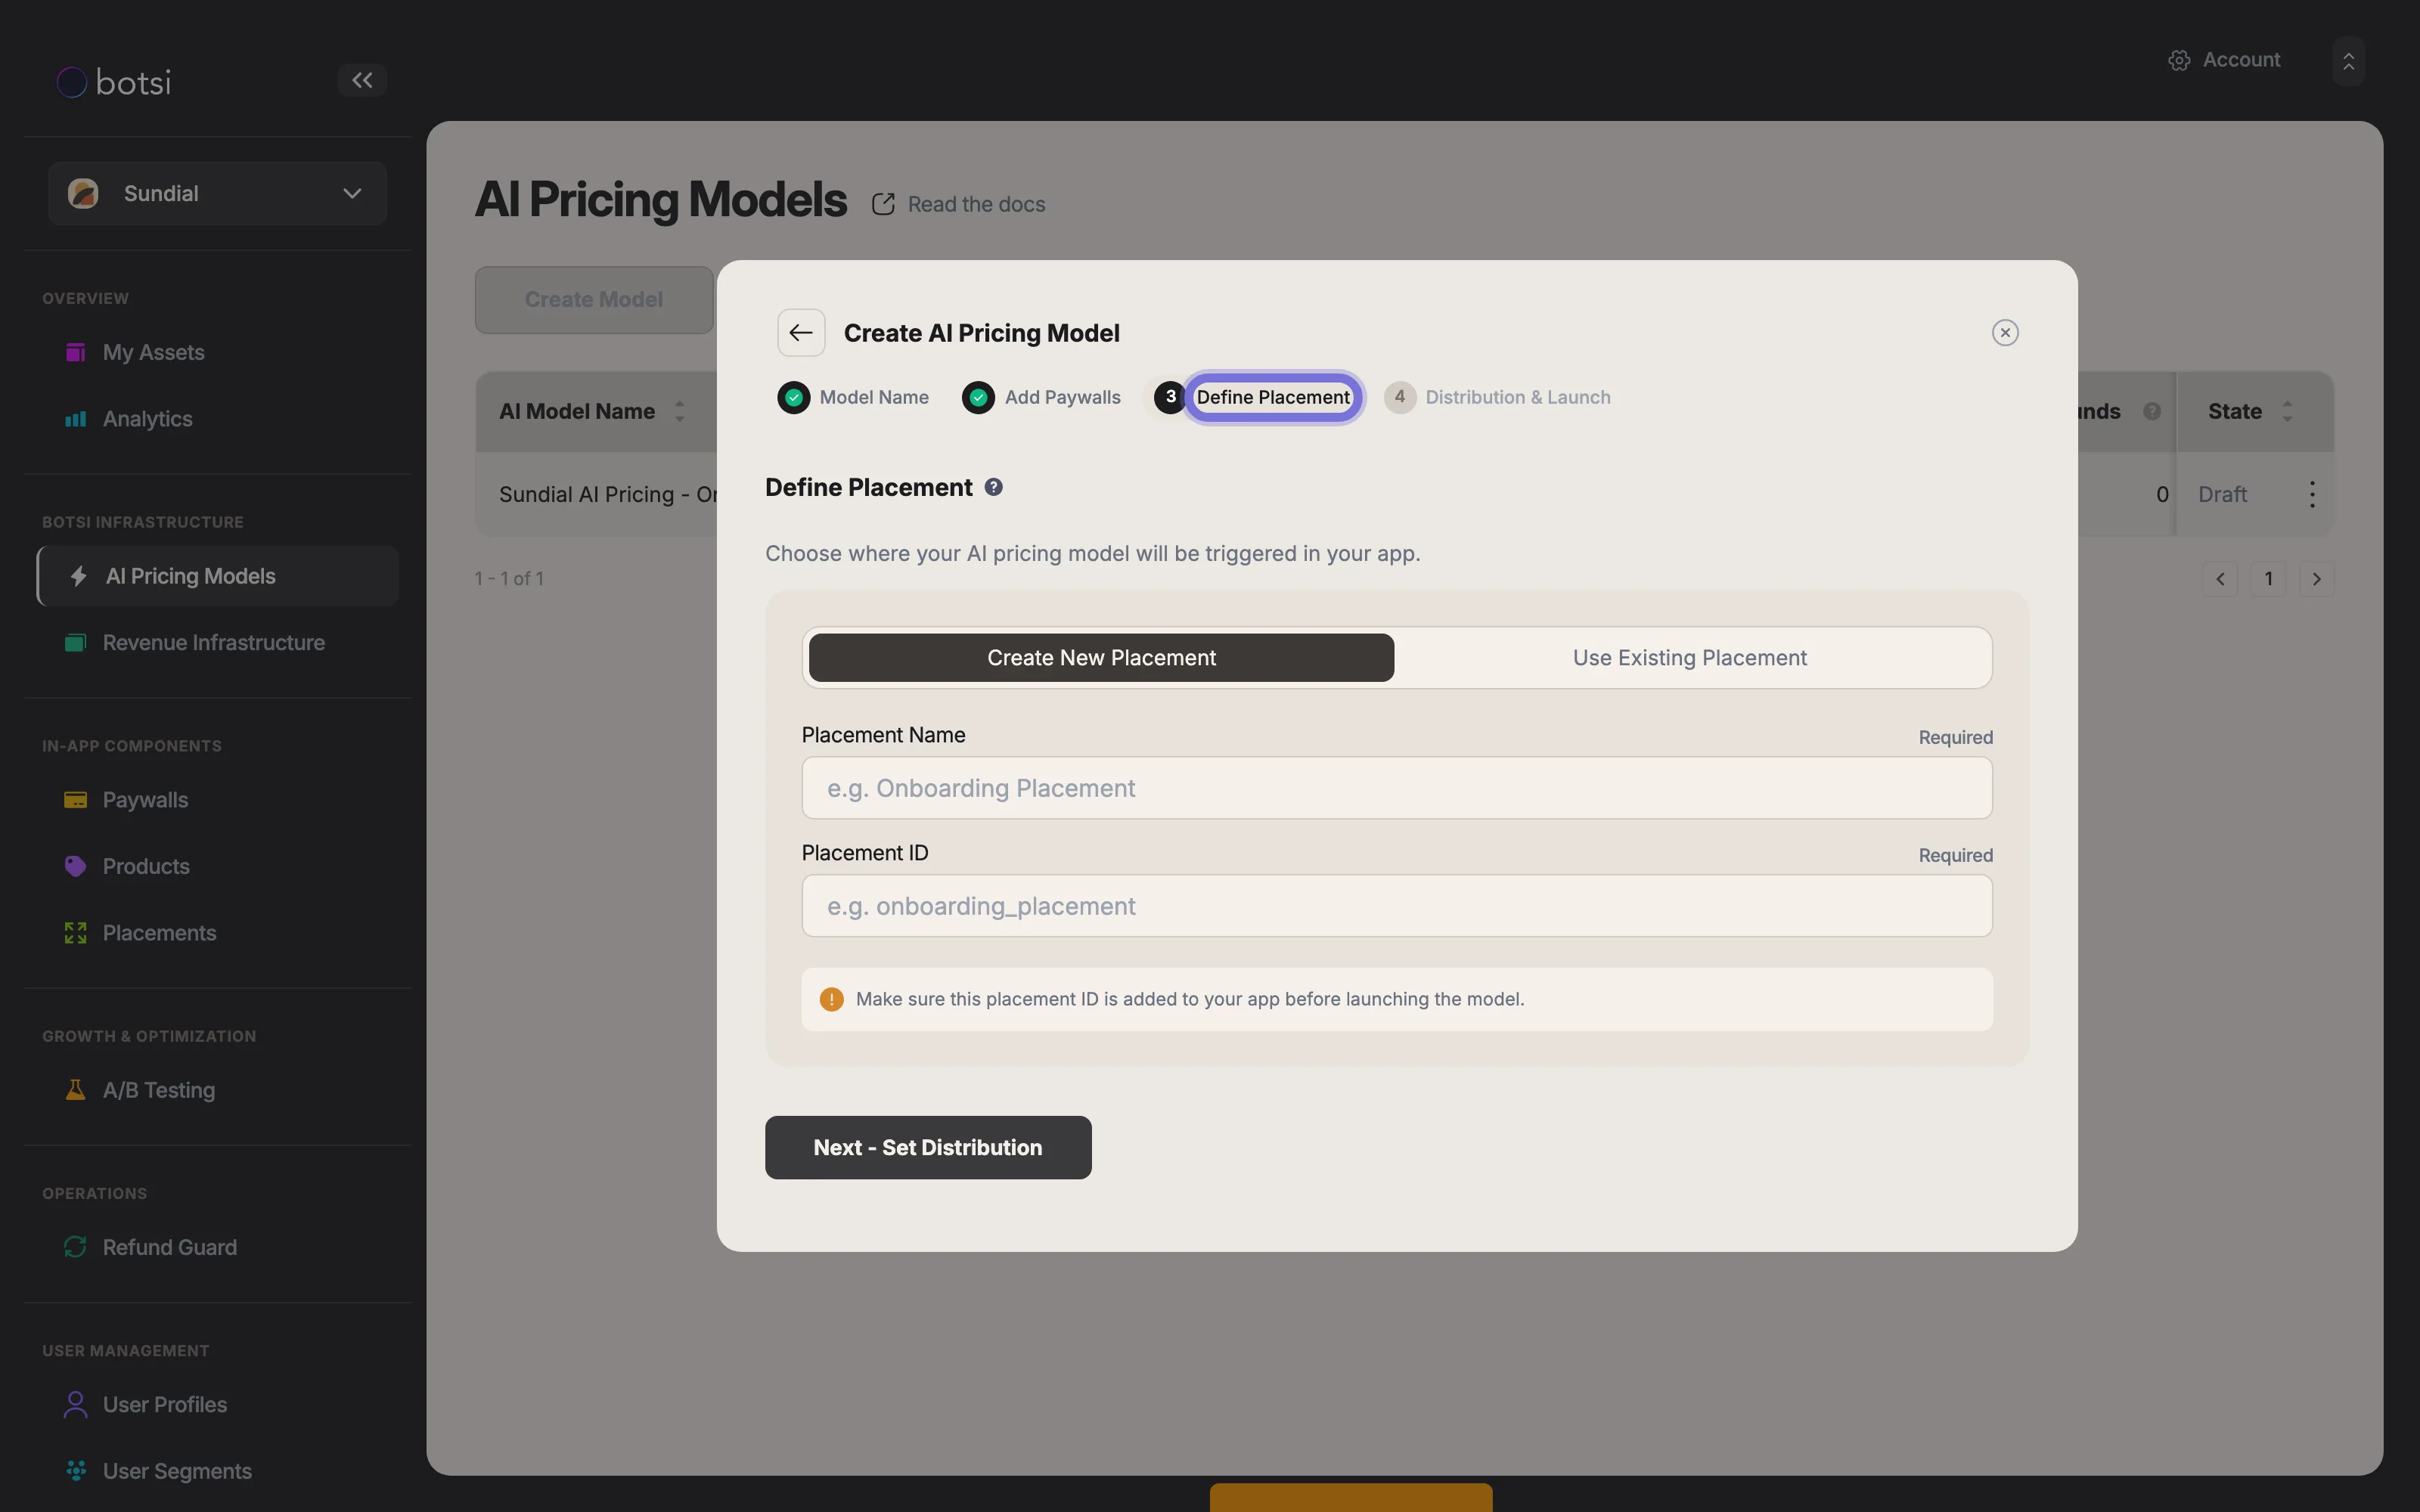
In Step 3, Define the Placement where the model will run. You have two options:
- Use an existing placement: Recommended if you already have a Botsi placement and either do not want or cannot make changes in your app. In this case, select an existing placement.
Create a new placementIf no suitable placement exists, or if you prefer to configure one specifically for this setup, select Create New and provide a name and ID for it.
-
In Step 4, Set Distribution and Launch your model. Use the slider to set the split between the Baseline Paywall and the AI Pricing Model. The percentage dictates how often each one is shown. In the example below, 70% of users see the Baseline Paywall and 30% see the AI-powered one.
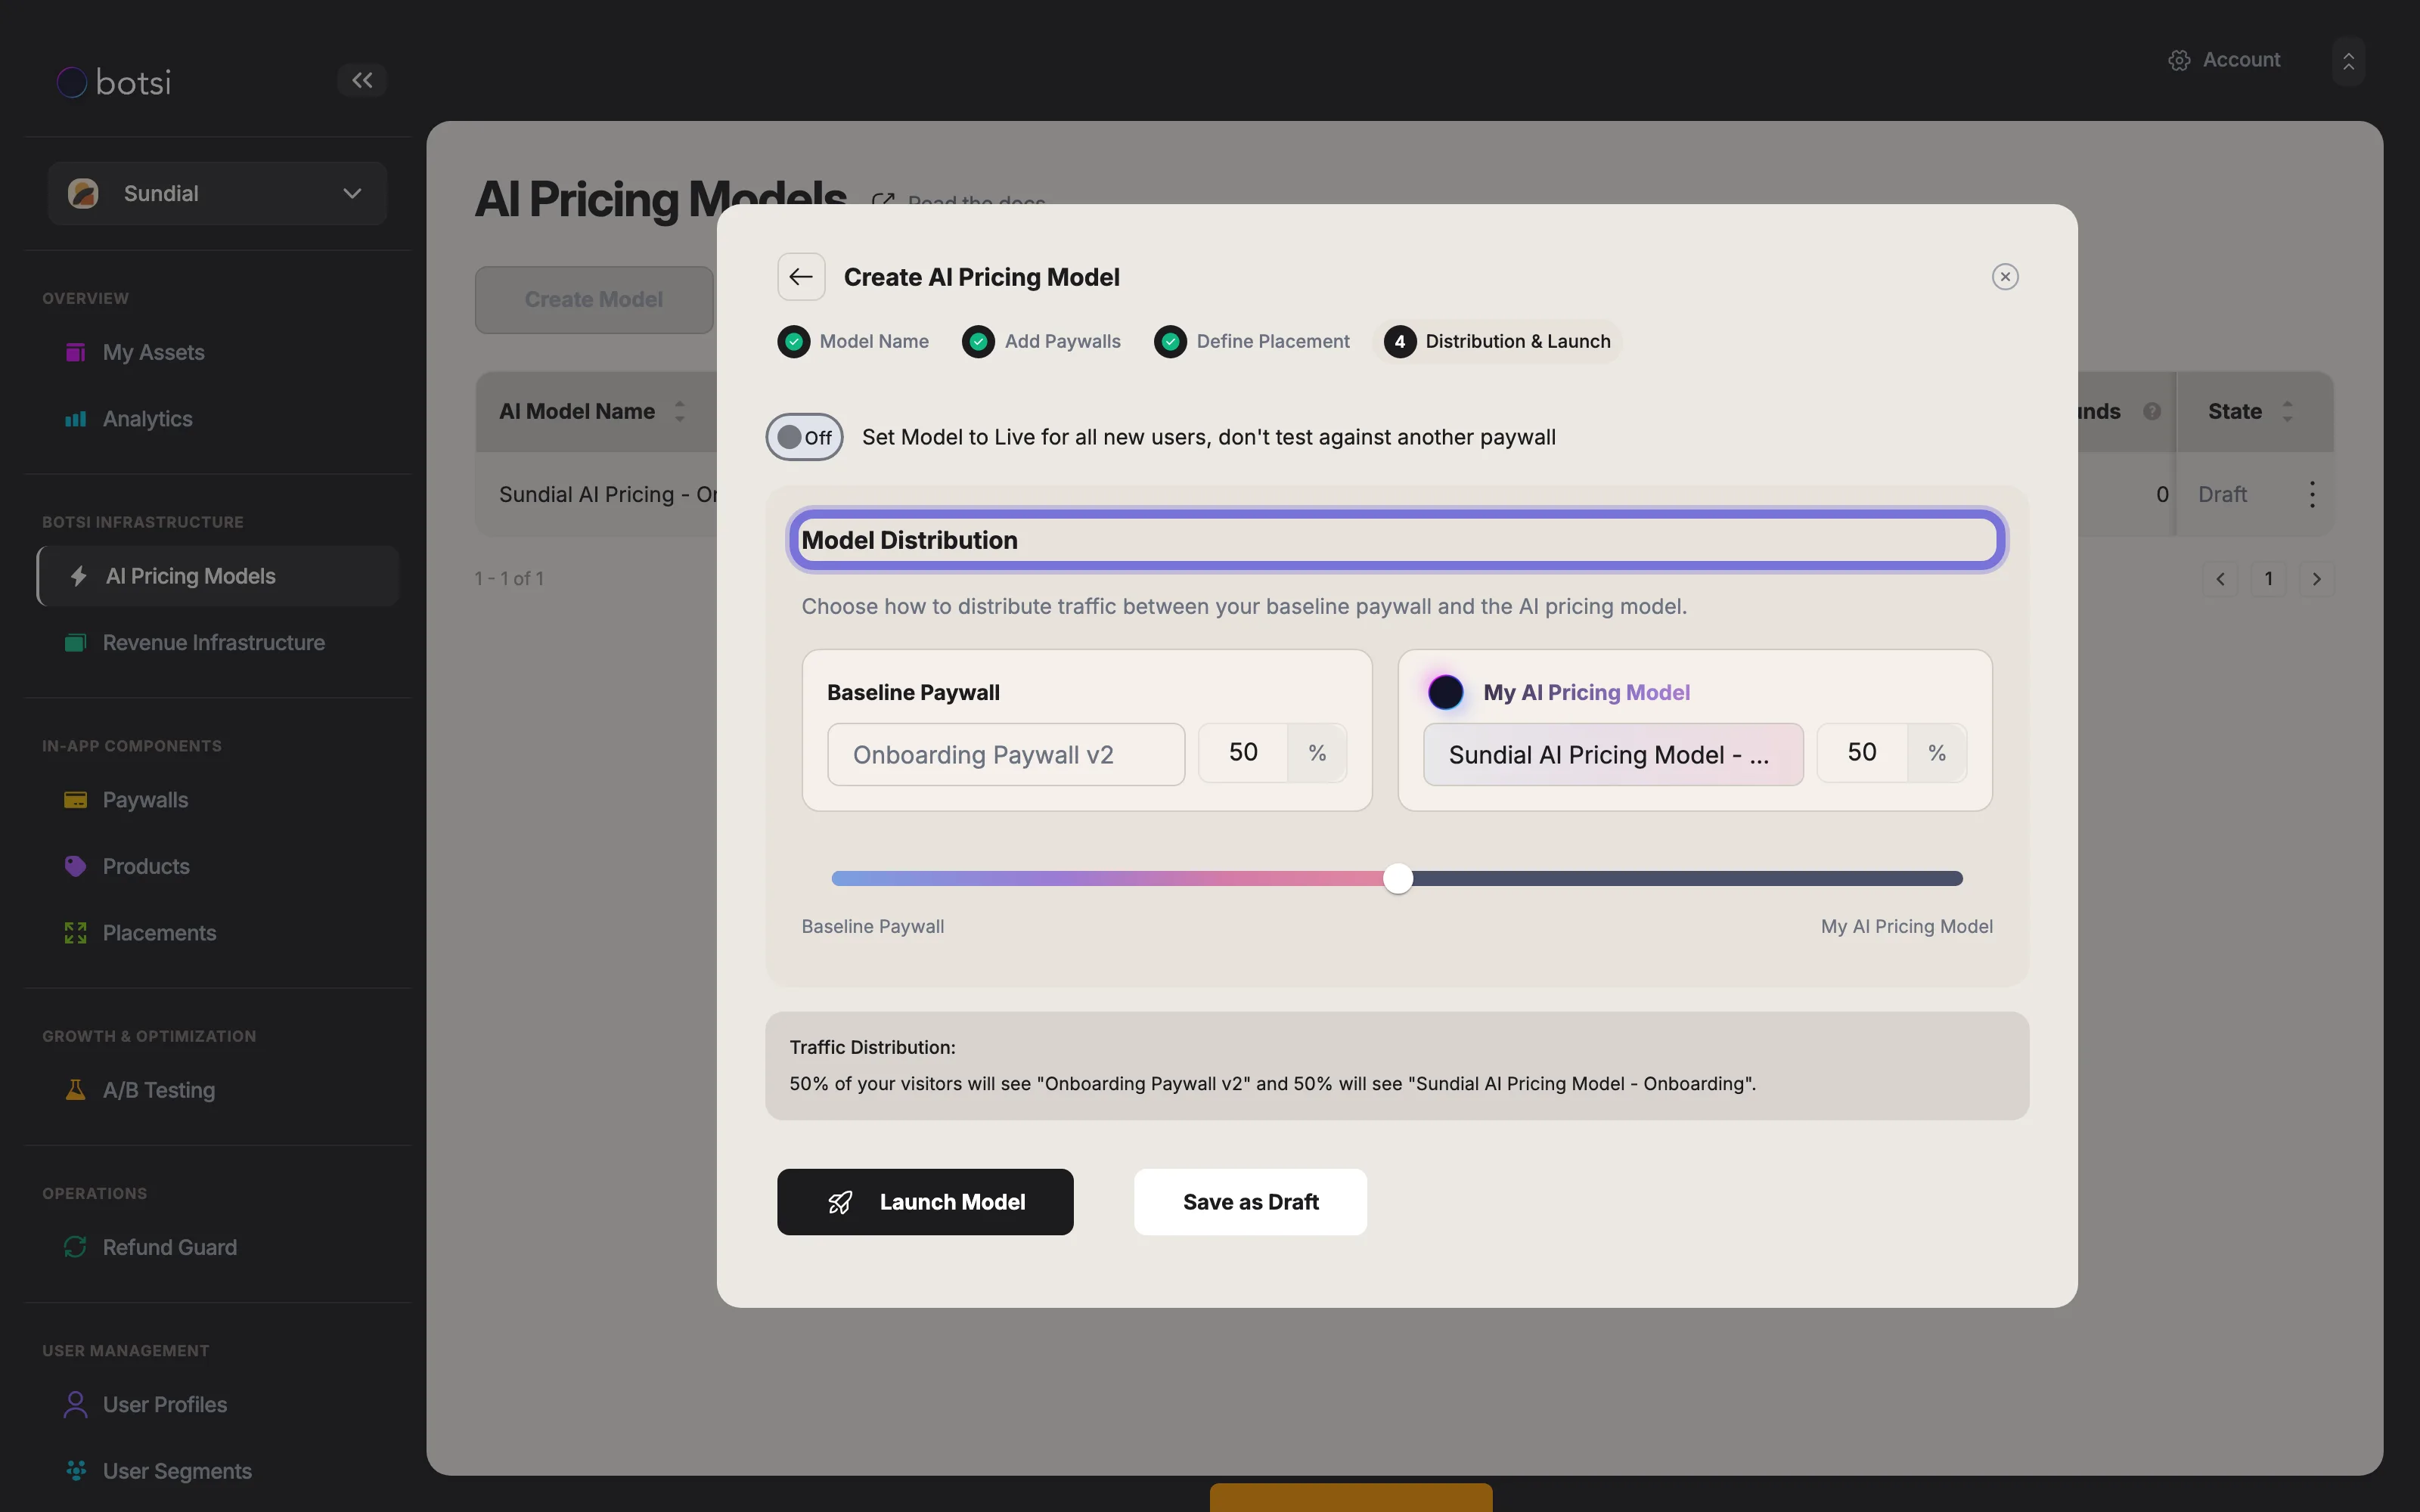 Activate the Live Toggle
The Set Model to Live for all new users, don’t test against another paywall toggle automatically sets the traffic distribution to 100% for the AI Pricing Model.
Once your configuration is complete, you have two options:
Launch Model: activates the model immediately according to your settings.
Save as Draft: saves your configuration to be launched later.
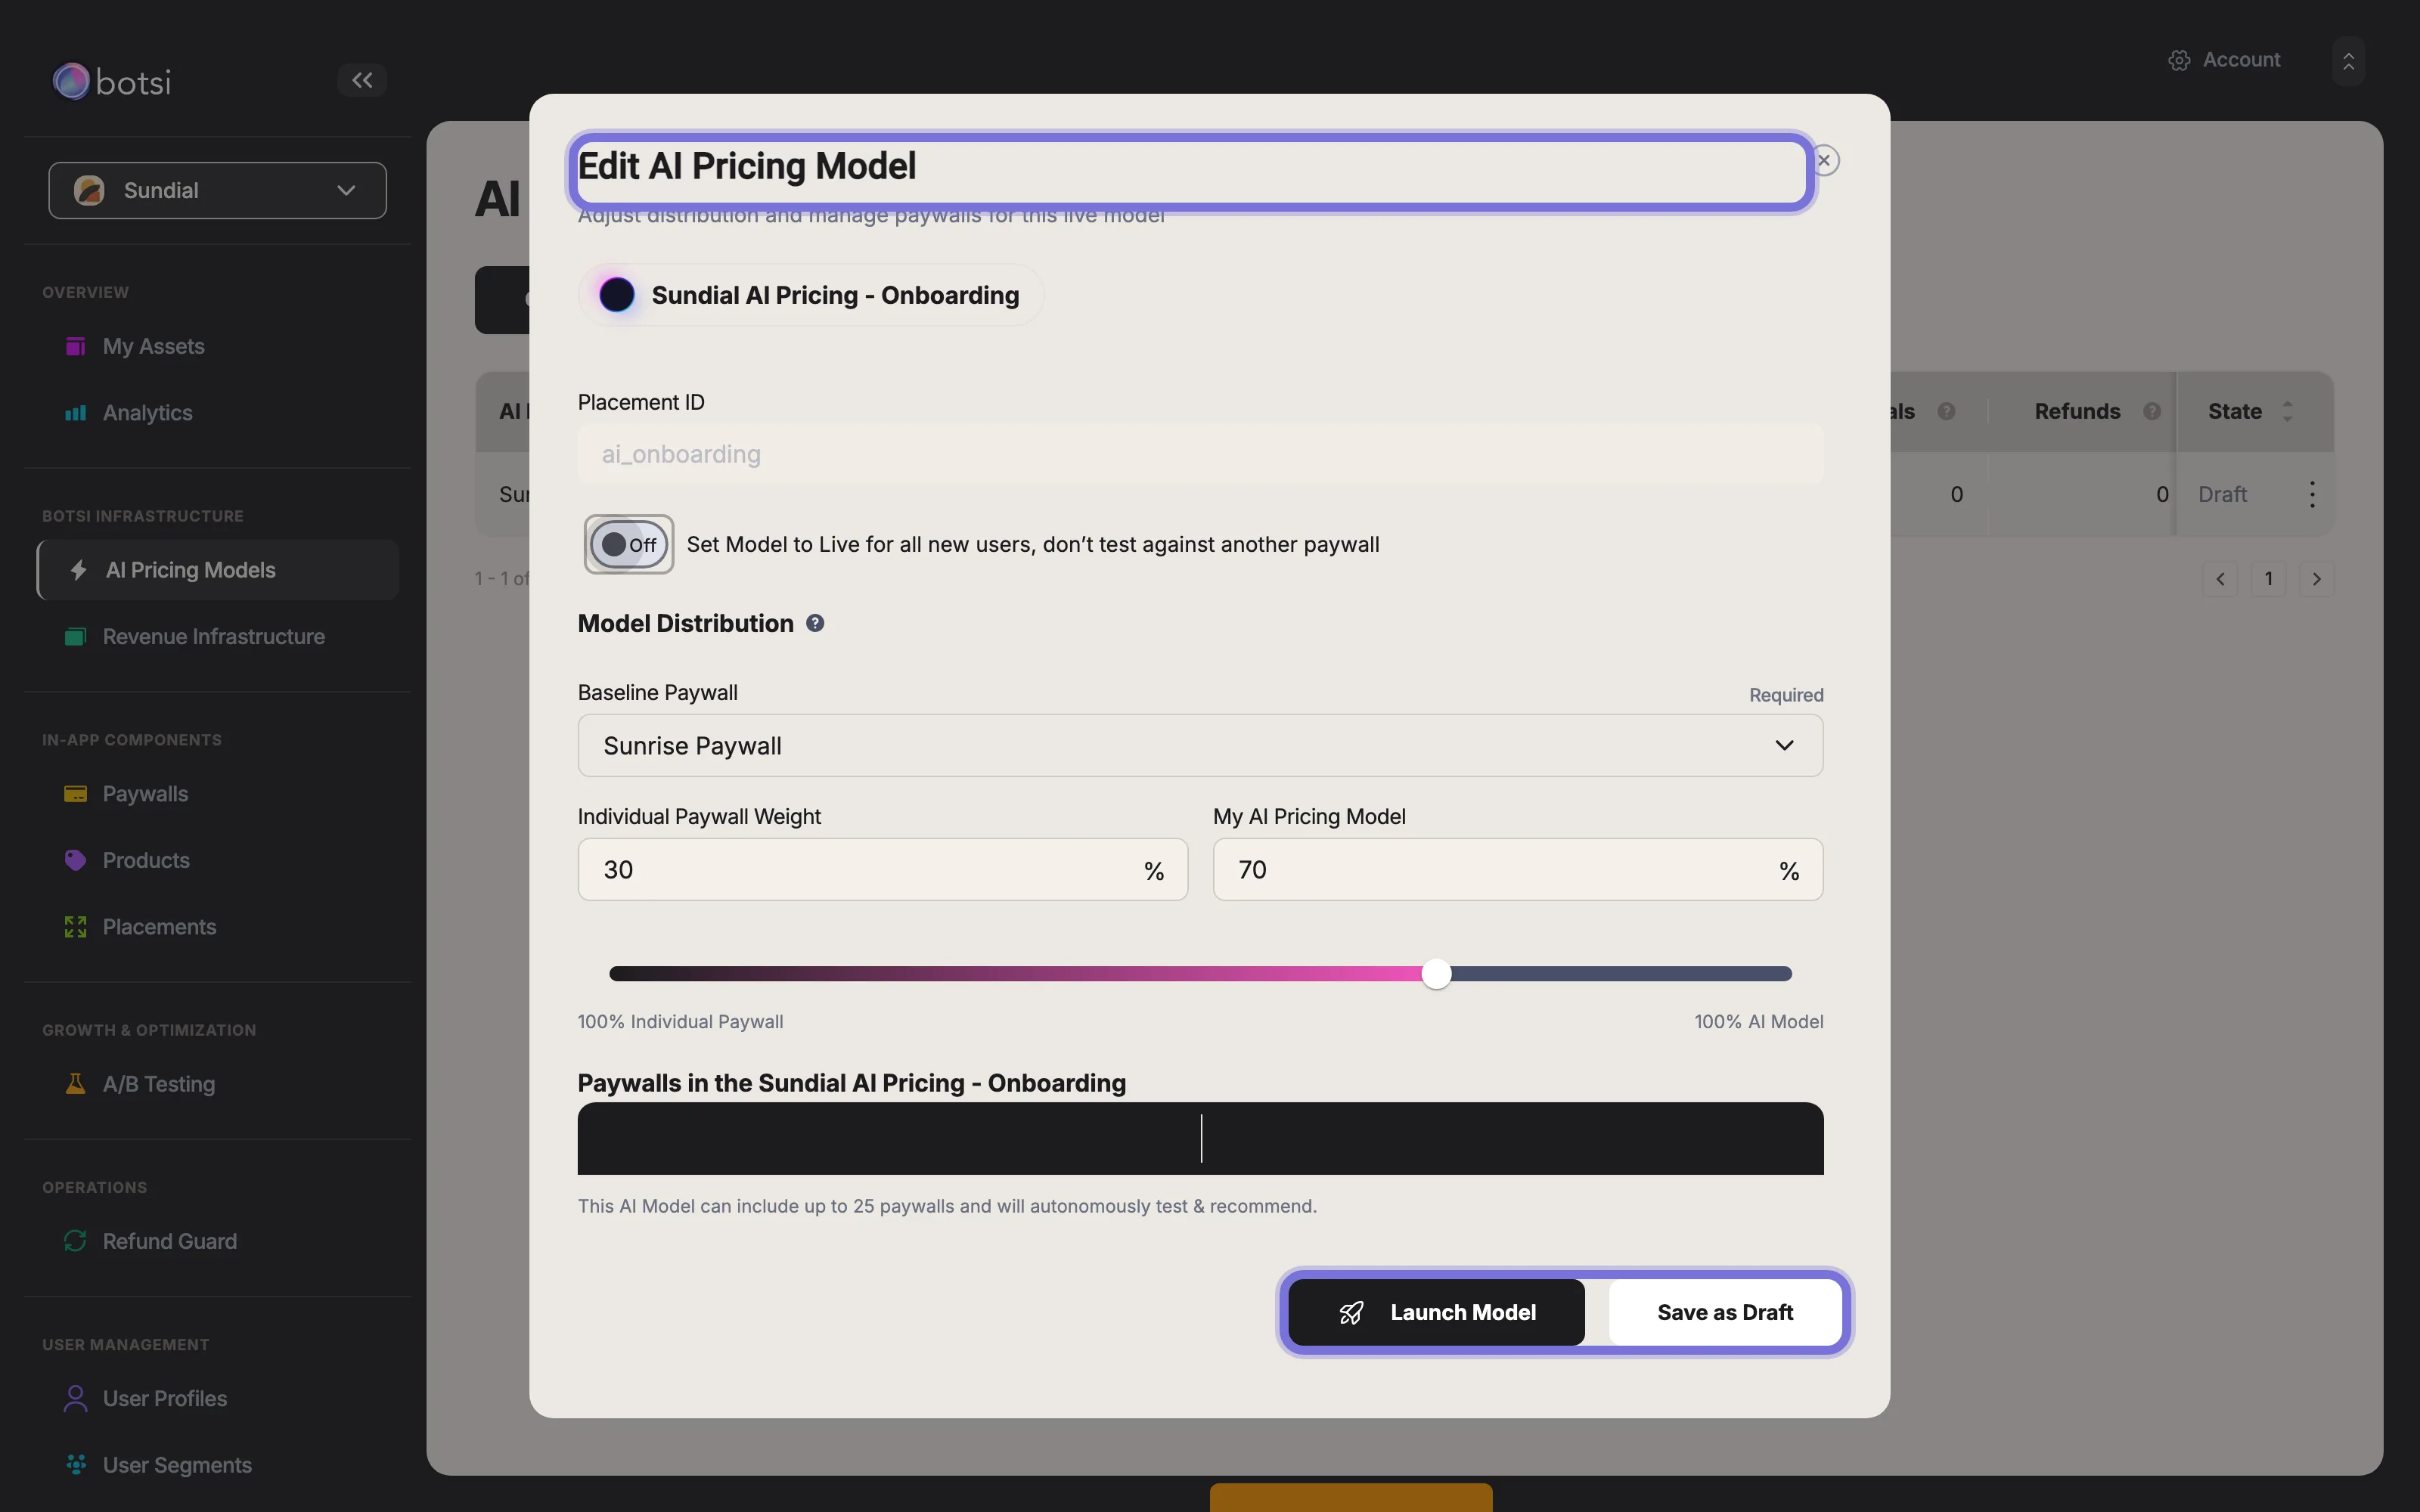
Post-Launch: Editing and Managing Your Model
After your model has been saved or launched, you can select it from the AI Pricing Models list to view and manage its settings. The Edit AI Pricing Model screen allows you to adjust distribution, manage paywalls, and view the model's details at any time.
See also
After completing these preparation steps, you are ready to integrate with our API.
Partner Integrations
If you use a third-party paywall or subscription management tool, see our dedicated integration guides:
- Superwall — Use Botsi AI pricing with Superwall campaigns and audience targeting.
- RevenueCat — Integrate Botsi with RevenueCat offerings and targeting rules.
- Adapty — Connect Botsi to Adapty paywall system and audience targeting.
- Web2Wave — Optimize pricing for web funnel users.
- Native Paywall Display — Build your own paywall UI with the Botsi API.
- Custom Web API — Integrate Botsi into web apps using REST API.